Install Cutback
Download and install Cutback extension for Premiere Pro to get started.
Of course, a genuine Premiere Pro is required.
Install on Windows
Step 1. Download the installer by clicking the button above.
Step 2. Run the downloaded CutbackInstaller.exe file.
Step 3. Proceed with the installation through the installer program.
Step 4. Restart Adobe Premiere Pro.
Step 5. Select the project you want to work on in Adobe Premiere Pro.
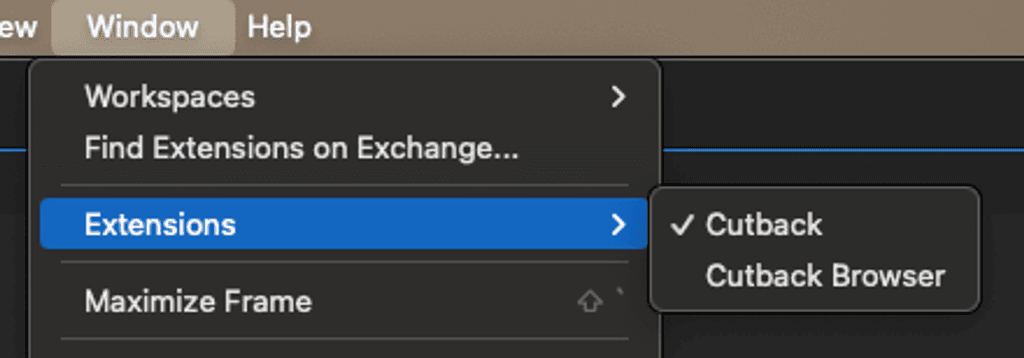
Step 6. Click "Window" > "Extensions" > "Cutback" to run Cutback.
Install on Mac
Step 1. Download the installer by clicking the button above.
Step 2. Run the downloaded CutbackInstaller.pkg
Step 3. Proceed with the installation through the installer program.
Step 4. Restart Adobe Premiere Pro.
Step 5. Select the project you want to work on in Adobe Premiere Pro.
Step 6. Click "Window" > "Extensions" > "Cutback" to run Cutback.
Install with ZXP file (Windows, Mac)
Use this method if you encounter errors with the Windows or Mac installation methods above.
Step 1. Download and install the ZXP plugin installation manager from the following links:
Step 2. Download the latest version of the Cutback ZXP installation file by clicking the button above.
Step 3. Run Extension Manager, click [Install] in the top left menu, and select the downloaded CutbackInstaller.zxp file to install.
Step 4. Restart Adobe Premiere Pro.
Step 5. Select the project you want to work on in Adobe Premiere Pro.
Step 6. Click "Window" > "Extensions" > "Cutback" to run Cutback.

