How to Set Up a Proxy Workflow in DaVinci Resolve
How to generate, locate, and troubleshoot proxy media in DaVinci Resolve, including the separate Blackmagic Proxy Generator app most editors don't know they already have.

TLDR: DaVinci Resolve gives you two ways to make proxies: generating them directly in the Media Pool or using the separate Blackmagic Proxy Generator app that ships with Resolve, and mixing up which one you use is the most common reason proxies don't show up.
DaVinci Resolve's proxy system is known for being more confusing than its Adobe Premiere or Final Cut Pro workflow counterparts. The reason being that there are two separate ways to generate proxies in Resolve, and they don't behave in the same way. This guide covers both: how to actually connect proxies once they exist, which settings to use, and the specific reasons "Generate Proxy Media" doesn't seem to do anything when it should.
Method 1: Generate Proxy Media Inside Resolve
This is the direct, built-in path, and it's what most tutorials describe:
Open your project and go to the
[Media Pool]Select the clips you want proxies for. This has to happen in the
[Media Pool]specifically; selecting clips only in a timeline won't work the same way.Right-click and choose
[Generate Proxy Media]Before this step matters, your proxy format needs to be set. Go to
[Project Settings], then[Master Settings], then find the[Optimized Media and Render Cache]section, and choose your format of either ProRes, DNxHR, or H.264, and resolution.
DaVinci Resolve then processes the proxies in the background while you keep working.
Method 2: The Blackmagic Proxy Generator App
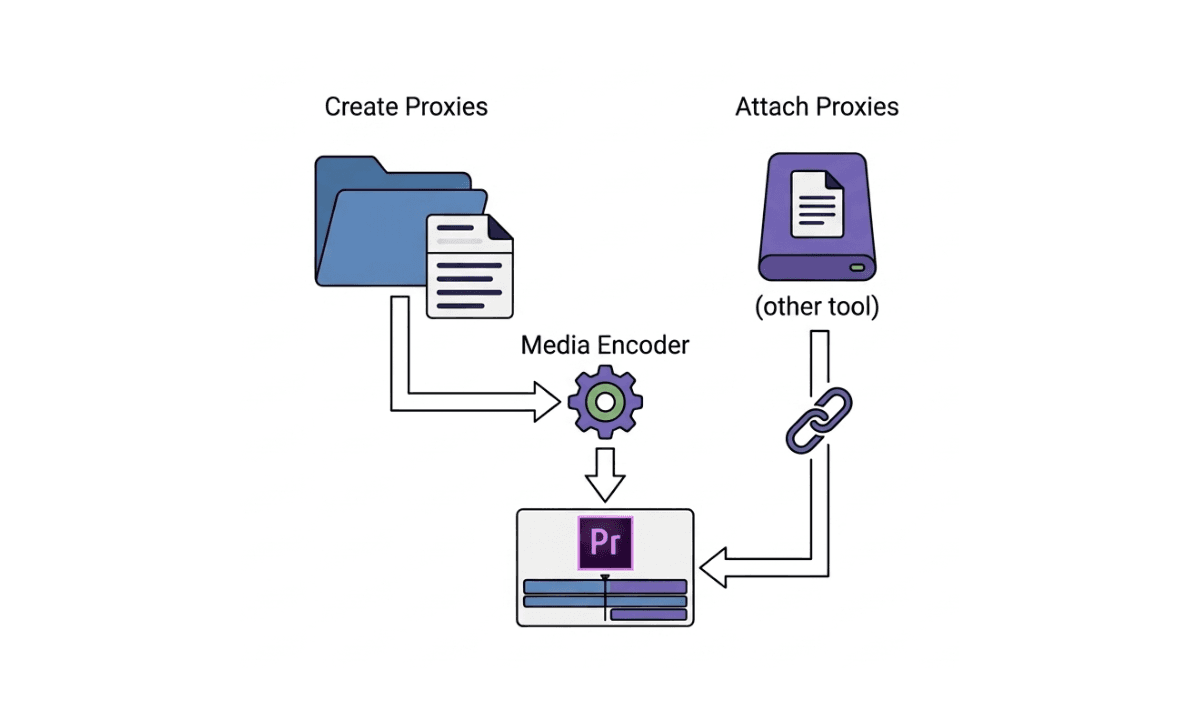
This is the one option that most editors don't realize they have. Blackmagic Proxy Generator is a separate, standalone application that installs automatically alongside DaVinci Resolve (free or Studio - think how Adobe Media Encoder comes with Adobe Premiere). You don't have to download it separately, and you don't need to go looking for it on Blackmagic's site.
On Windows it's under Start > Blackmagic Design; and on Mac it's in your Applications folder alongside Resolve itself.
The way it works is different from the in-Resolve method: instead of generating proxies from clips that are already in a project, you point it at watch folders (defined as directories containing your original camera files), and it monitors those folders continuously (at roughly a 10-20-second interval), automatically generating a proxy the moment a new file lands in a watched folder. This means you can start generating proxies before you've even created your Resolve project, or let it run in the background on a completely separate machine while you edit uninterruptedly on another.
If you're on Windows, it's worth noting that the free version (called Blackmagic Proxy Generator Lite) relies on your operating system's built-in codecs, and Windows doesn't natively support ProRes. This is a licensing detail. That means that ProRes proxy generation is disabled on the free Windows version specifically. DNxHR and H.264 remain available. Mac users don't have the same limitation, however.
Where Do DaVinci Resolve Proxies Get Saved to?
Where proxies get saved in DaVinci Resolve depends on which method you've used to generate them. Proxies made via Blackmagic Proxy Generator save automatically into a [proxy] subfolder created inside your assigned watch folder. You'll find it alongside your original camera footage. Proxies made via [Generate Proxy Media] inside Resolve save to the destination folder you specified in [Project Settings] > [Master Settings] when you configured the format.
Why Isn't [Generate Proxy Media] Showing Up or Doing Anything?
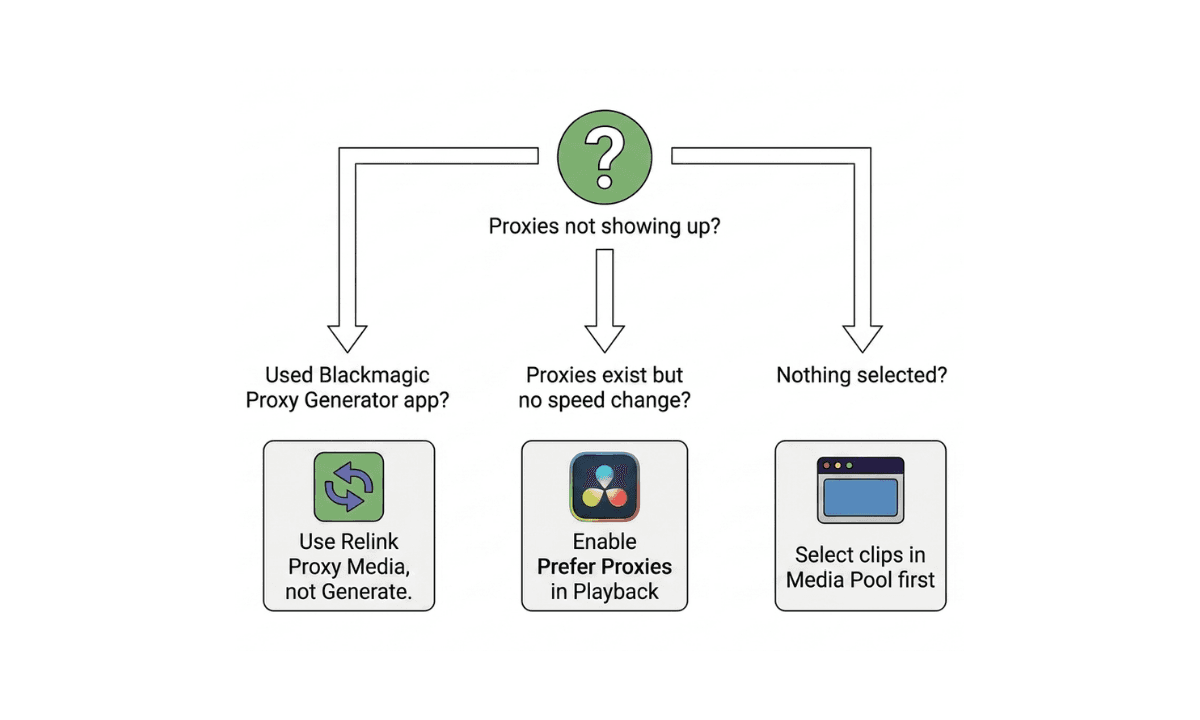
If this happens, it's usually for one of three reasons.
You either generated proxies with one method, but you're trying to connect them with the other. If you used the standalone Blackmagic Proxy Generator app, the clips don't automatically link inside Resolve; you connect them with a different command than the one that created them. In the [Media Pool], right-click the clips and choose [Relink Proxy Media] (not Generate Proxy Media, which is for creating proxies from inside Resolve directly), then direct it at the proxy subfolder the app created.
Proxies exist and are linked, but Resolve isn't set to use them during the edit. Generating or linking proxy media doesn't automatically switch playback to use them. You have to separately enable this. In DaVinci Resolve 18 and later versions, go to [Playback] then [Proxy Handling] then [Prefer Proxies]. In Resolve 17 and earlier, the same setting is under [Playback] then [Use Proxy Media If Available]. If you've created proxies but aren't seeing any timeline performance improvement in Resolve, then it's likely that the proxies exist, but Resolve is still playing back the original footage.
Nothing was selected in the [Media Pool] before right-clicking. Selecting clips in a timeline, a bin view, or anywhere other than the Media Pool itself won't make the option behave as expected. Reselect directly in the [Media Pool] and try again.
What Are the Best Proxy Settings for DaVinci Resolve?
For most editing workflows, a good starting point is half resolution (½) or quarter resolution (¼) relative to your original footage, using ProRes or DNxHR if editing performance matters more than file size, or H.264 if you need smaller files and don't mind slightly heavier CPU decoding during scrubbing.
Quarter resolution is usually enough for 4K and above, since you're not judging fine detail during the edit, only pacing, framing, and performance. The same can be said for half resolution. It is a reasonable middle ground if you're doing detailed reframing work during the cut itself.
Optimized Media vs Proxy Media in DaVinci Resolve
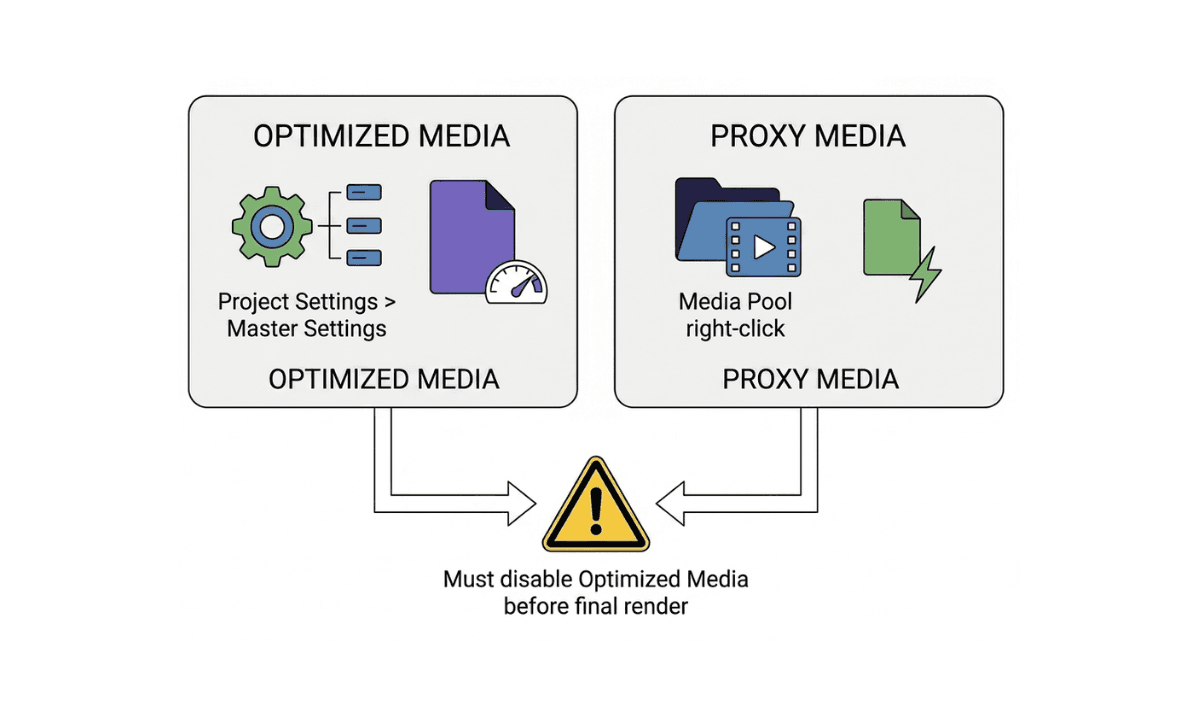
Resolve treats these as two separate systems, and it's worth being precise about the difference since they're configured in different places and don't automatically disable each other.
Optimized Media transcodes your originals to a codec like ProRes or DNxHR at full resolution, with better playback performance than the native camera file, but not a smaller file the way a true proxy is. It's set from [Project Settings] then [Master Settings] and applied per-clip via [Generate Optimized Media] in the [Media pool].
Proxy Media is the lighter, lower-resolution stand-in, generated via either of the two methods mentioned above.
If you used Optimized Media at any point, it has to be manually disabled before you finish the project via the [Playback] menu by clicking [Use Optimized Media], which has its own toggle, separate from the proxy settings entirely. Leaving it enabled means your timeline keeps referencing the optimized version even after you've relinked your proxies to full-resolution originals, which is an easy step to miss precisely because it lives in a completely different menu than the relink action itself.
Does Proxy Reduce Quality in DaVinci Resolve?
Not in your final export, as long as you relink to your original camera files before rendering. The proxy is a working file used during the edit only; once relinked through the [Media Pool], then selecting clips, right-clicking [Relink Selected Clips], and directing that to your original camera footage. Your delivered render comes from the full-resolution source material, not the proxy. The one thing worth double-checking specifically in Resolve is whether Optimized Media was ever enabled on the project. Confirm it's switched off (see above) before the final render; otherwise you could be exporting from the optimized version instead of the true original files without realizing it.
Bringing Selects-Prepped Footage into a DaVinci Resolve Proxy Workflow
If you're using Selects for pre-editing, the proxy workflow slots in before Selects rather than after. Generate your proxies in Resolve first (either method above), then import only the proxy folder into Selects, not your original camera files alongside it. Selects analyzes whichever set it's given and builds your rough cut from that footage specifically.
Once your draft is ready, Selects hands off a native .drp project file. Import it through Resolve's Project Manager (right-click in the project list, choose [Import Project]), and the timeline opens referencing your proxy media exactly as it would if you'd built the sequence manually. From there, relinking to your originals works the same way described above: [Media Pool], [Relink Selected Clips], point it at your camera files. If Optimized Media was part of your workflow at any point, the same reminder applies: disable it in [Playback] before your final render.
Frequently Asked Questions (FAQs)
Q: How do you do proxy video editing in DaVinci Resolve?
A: Select clips in the [Media Pool], right-click, and choose [Generate Proxy Media], after first setting your proxy format and resolution in [Project Settings] and then [Master Settings]. Alternatively, use the separate Blackmagic Proxy Generator app that installs automatically with Resolve, which watches folders and generates proxies from your original files before they're even imported into a project.
Q: What are the differences between proxy and optimized media workflow in DaVinci Resolve?
A: Optimized Media transcodes your footage to a full-resolution intermediate codec (like ProRes or DNxHR) for smoother playback, without actually reducing file size. Proxy media creates a genuinely smaller, lower-resolution stand-in specifically for editing speed. They're configured separately and don't disable each other automatically. If you used Optimized Media, it needs to be manually turned off in Playback before your final render.
Q: What are the best proxy settings for DaVinci Resolve?
A: Quarter or half resolution relative to your originals works well for most projects; quarter resolution is usually enough for 4K and above since you're judging pacing and framing rather than fine detail during the edit. ProRes or DNxHR gives smoother playback performance; H.264 produces smaller files but decodes with more CPU effort during scrubbing.
Q: Does proxy reduce quality?
A: Not in your final export, as long as you relink to your original camera files before rendering. The proxy only affects what you see on screen while editing. In DaVinci Resolve specifically, also confirm Optimized Media is disabled if it was used at any point; otherwise, your render could pull from the optimized version instead of the true original video file.
Q: Why isn't Generate Proxy Media showing up or working in DaVinci Resolve?
A: The most common cause is generating proxies with the separate Blackmagic Proxy Generator app but trying to connect them using [Generate Proxy Media] instead of [Relink Proxy Media]; those are two different commands for two different situations. The second most common cause is that proxies were generated correctly, but Resolve isn't set to actually use them; that requires separately enabling [Playback], then [Proxy Handling], then [Prefer Proxies] or [Use Proxy Media If Available] depending on your version of DaVinci Resolve.
Q: What is Blackmagic Proxy Generator, and do I need to download it separately?
A: Blackmagic Proxy Generator is a standalone app that installs automatically alongside DaVinci Resolve, free or Studio; no separate download necessary. It runs independently of Resolve, monitoring watch folders and generating proxies for new files automatically, which means you can prepare proxies before creating a project or while editing continues uninterrupted. On Windows, the free version can't generate ProRes proxies due to codec licensing; DNxHR and H.264 remain available.
Q: Where does DaVinci Resolve save proxy files?
A: It depends on how they were generated. Proxies made through Blackmagic Proxy Generator save into a proxy subfolder created inside the watch folder you selected. Proxies generated inside Resolve via [Generate Proxy Media] save to whichever destination folder was specified in [Project Settings], then [Master Settings].

Kay Sesoko
Marketer
Share post