Proxy Workflow Compared: Adobe Premiere, DaVinci Resolve, and Final Cut Pro
How proxy editing actually works in Premiere Pro, DaVinci Resolve, and Final Cut Pro, compared side by side, plus whether proxies reduce quality and which codec to pick.

TLDR: Proxies work the same way across all NLEs such as Adobe Premiere, DaVinci Resolve, and Final Cut Pro in principle. Each NLE handles creation, codecs, and relinking differently; which is why you should pick your video editing workflow carefully.
Every NLE solves the same problem in a similar way. They give you the option to take 4K, 6K, and/or 8K camera files that are heavy enough to cause timeline lag and playback lag on most computers, and edit them with a lighter-load stand-in file instead. You can then swap back to the original files when you're done. That's the whole concept of a proxy. Moving between NLEs or workflows on a team tends to cause confusion because the proxy toggle is placed in different places, called by a different name, or has varying levels of reliability when relinking footage later.
For more on the technical aspects of editing, make sure to check out our technical video editing, make
What is a Proxy?
A proxy is a smaller, lower-resolution copy of your original footage, generated specifically so your computer doesn't have to decode a heavy file every time you scrub the timeline. If a camera shoots 6K ProRes RAW at a bitrate that chokes a laptop's playback, the proxy might be a 1080p H.264 version of the exact same shot, same content, same timecode, but at a fraction of the file size. You end up editing against that lightweight copy. When you're ready to color grade and export, the NLE then swaps the proxy back out for the original files with their full quality. This process is called 'relinking' regardless of which NLE you use.
How to Use a Proxy
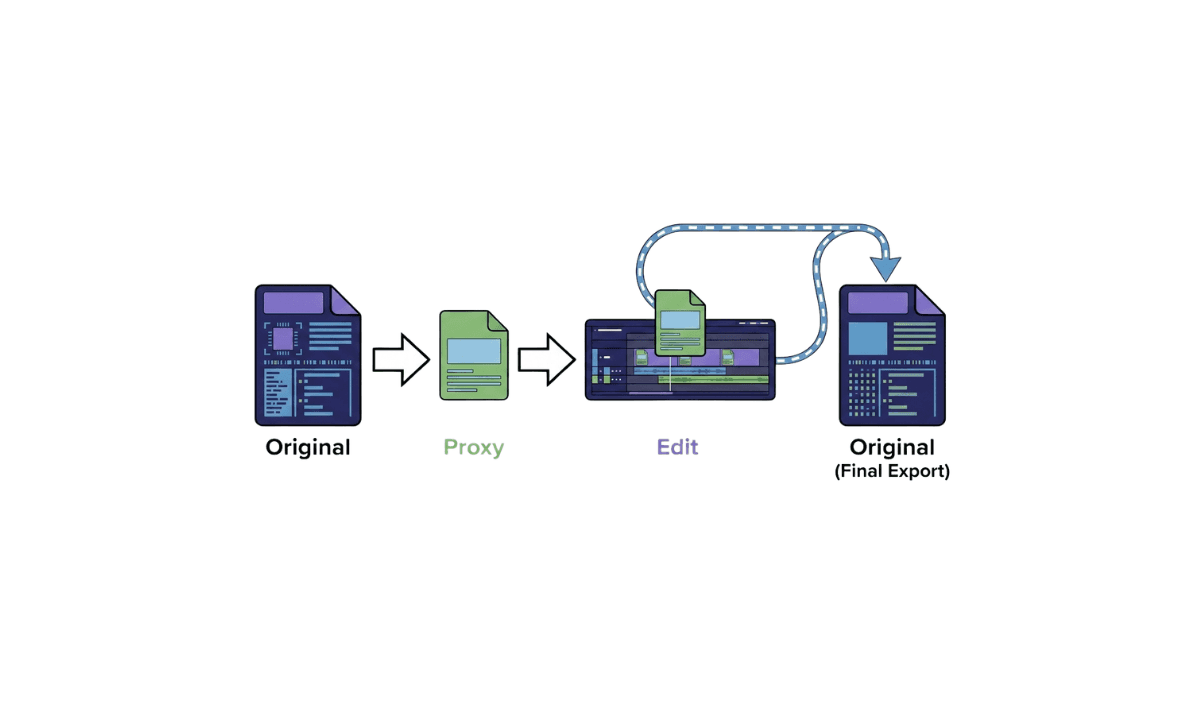
The workflow is the same regardless of whether it's in Adobe Premiere, DaVinci Resolve, or Final Cut Pro. You can just access it from different menus in their respective interfaces.
Generate proxy files from your original footage (either during import or afterwards)
Edit against the proxies with faster playback and a lighter system load
Finish your edit
Relink to the original camera files before color grading, effects, and export
Does a Proxy Reduce the Quality of the Footage?
No, it doesn't. A proxy is a working file and not the final version of it. As long as you relink to your original camera footage before exporting, your final output comes from the full-resolution original. Each NLE does this by matching the filename and timecode of your files to each other. Your video quality will only reduce on your monitor when you're editing. A proxy will look visibly softer or more compressed than the original while you're making cuts. This has no impact on the final deliverable file, assuming the relink actually happens and is matched correctly.
ProRes Proxy vs. H.264: Which Codec Should You Use?
Both Premiere Pro and Final Cut Pro offer these as proxy codec choices, and the tradeoff is consistent across both video editing software:
ProRes Proxy: decodes with less CPU effort, which means smoother scrubbing and playback, especially on Mac hardware. The tradeoff is file size because ProRes Proxy files are meaningfully larger than an equivalent H.264 proxy, so they take up more drive space and take longer to generate.
H.264: produces much smaller files, useful if drive space or transfer speed is the constraint, but it's more CPU-intensive to decode in real time than ProRes since H.264 relies on interframe compression that has to be unpacked constantly during scrubbing. On an older or lower-spec machine, H.264 proxies can actually feel choppier than ProRes Proxy despite the 'lighter' file size.
The practical rule: if editing speed and smooth scrubbing matter more than drive space, use ProRes Proxy. If you're tight on storage or moving files between machines frequently, H.264 is the more practical choice.
What is the Difference Between Optimized Media vs Proxies?
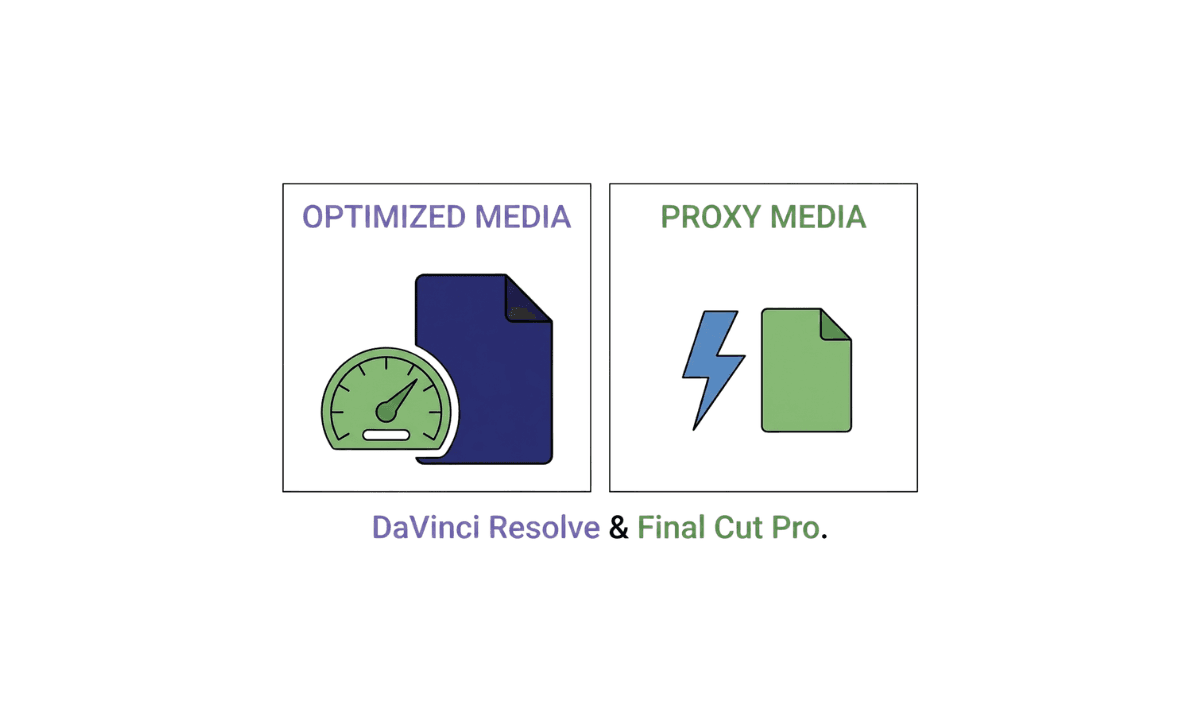
DaVinci Resolve and Final Cut Pro have another alternative to creating proxies in your video editing workflow, too.
In DaVinci Resolve, Optimized Media and Proxy Media are two separate systems, set in two different places. Optimized Media transcodes your original video files into a codec like ProRes or DNxHR at full resolution, with better playback performance than the native camera file, but not actually smaller or lighter the way a true proxy is intended. Proxy Media is the lighter, lower-resolution stand-in in the more traditional sense. They're configured separately, though. Optimized Media lives under Project Settings > Master Settings; Proxy Media is generated per-clip from the Media Pool, and mixing them up often results in timeline lag in DaVinci Resolve, because enabling one doesn't automatically disable the other.
In Final Cut Pro, the same distinction exists. Optimized Media transcodes to a higher-quality intermediate codec (typically ProRes 422) for better performance without dropping resolution, while Proxy Media is the smaller, lower-resolution version specifically meant for speed on lower-spec systems. Both are configured through the same Transcoding section on import, or via File > Transcode Media afterward. This makes the two options easier to keep straight in FCP than in DaVinci Resolve whilst maintaining the same idea.
Premiere Pro doesn't really split this into two named systems the same way. Its [Create Proxies] workflow is the equivalent of the true proxy workflow we've explored until now. There is no separate parallel for 'Optimized Media'.
Proxy Workflows in Each NLE (Adobe Premiere, DaVinci Resolve, Final Cut Pro) Compared
Proxy Workflow in Premiere Pro
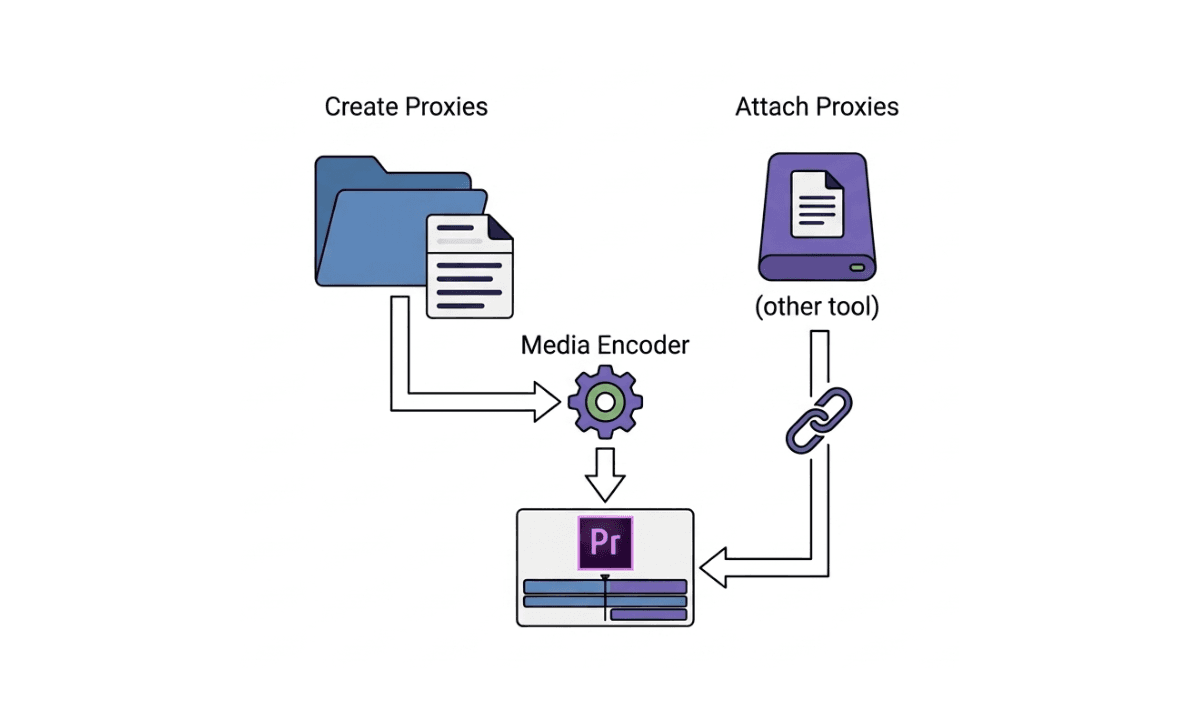
Premiere handles proxy creation both at import and after the fact. On import, enabling "Create Proxies" in the Import window and choosing a preset (H.264 or ProRes Proxy) hands the job to Adobe Media Encoder automatically. For footage already in your project, selecting clips in the Project panel and choosing Proxy > Create Proxies from the right-click menu does the same thing retroactively.
Relinking is handled through the [Link Media] button. Select the clips, right-click, and Premiere matches proxies to originals using filename and metadata with no manual timecode entry required as long as the files weren't renamed somewhere in the process.
Proxy Workflow in DaVinci Resolve
DaVinci's two-path system (Optimized Media vs. Proxy Media), as we mentioned above, means the first real decision isn't on how to make a proxy but which of the two systems works best for your workflow. For a true lightweight proxy, selecting clips in the Media Pool and choosing Generate Proxy Media from the right-click menu is the direct path; the codec and destination folder are chosen at that point.
If you used Optimized Media at any point in the project, it needs to be manually disabled before finishing your edit. Resolve's Playback menu has a [Use Optimized Media] toggle that must be turned off, or your timeline keeps referencing the optimized version instead of the original even after relinking proxies.
Proxy Workflow in Final Cut Pro
Final Cut's proxy creation happens through the same transcoding controls, whether you're doing it on import or afterward via File > Transcode Media, checking [Create Proxy Media] and picking ProRes Proxy or H.264. Where FCP has a real advantage over the other two apps is that proxy status is visible and toggleable directly in the viewer (switching between Proxy and Optimized/Original playback quality from a single control), which makes it harder to accidentally forget which version you're looking at compared to DaVinci's split-menu system.
Relinking uses File > Relink Files > Original Media, and just like Premiere, the match happens automatically via filename, metadata, or timecode.
Where Selects Fit Into This
Selects works with proxy files from all three NLEs covered here, and the workflow shape is the same regardless of which one you're using: create proxies in your NLE first, then import only the proxy folder into Selects, never the proxy folder and the original files together. Selects analyzes whichever set you hand it and builds your rough cut from that footage specifically.
Once the draft is ready, Selects hands off a native project file for each NLE: a .prproj for Premiere, an FCPXML for Final Cut Pro, and a .drp for DaVinci Resolve. The relink step happens in the respective NLE exactly the way it would in a proxy workflow you'd built manually. Select the clips, choose Relink or Link Media, and point it at your original camera files. Selects doesn't change or skip that step; it just means the sync, organization, and rough-cut assembly happened automatically before you ever opened your NLE.
One detail worth knowing regardless of whether Selects is part of your workflow: proxies aren't required to use it. Original camera files work directly; proxies are simply the faster option once footage crosses into 4K and above.
Try Selects for free for 7 days.
Frequently Asked Questions (FAQs)
Q: What is a proxy with an example?
A: A proxy is a smaller, lower-resolution copy of your original footage, made so your computer doesn't have to decode a heavy file while editing, For example, if a camera shoots 6K ProRes RAW, the proxy might be a 1080p H.264 version of the same shot at the same timecode, edited against for speed, then swapped back to the full-resolution original before final export.
Q: How do you use a proxy?
A: Generate proxy files from your originals, either on import or afterward, edit against the lightweight proxies for faster playback, then relink to the original camera files before color grading and export. The specific menu names differ across Premiere Pro, DaVinci Resolve, and Final Cut Pro, but the four-step workflow is the same in all three.
Q: How do you do proxy editing?
A: Proxy editing means cutting your project against lightweight stand-in files instead of your full-resolution originals, then swapping back to the originals once the creative edit is locked. This keeps playback and scrubbing smooth on footage that would otherwise be too heavy to edit comfortably, without affecting the quality of the final delivered file, since the relink step restores full resolution before anything gets exported.
Q: Does proxy reduce quality?
A: Not in the final output, as long as you relink to your original camera files before exporting. The proxy is a working file used only during editing; the delivered version comes from the full-resolution original. The only thing to verify is that the relink actually completed and matched correctly, since a missed relink would mean exporting from the lower-quality proxy by mistake.
Q: Should I use ProRes Proxy or H.264?
A: ProRes Proxy decodes with less CPU effort, giving smoother playback and scrubbing, especially on Mac, but produces large files. H.264 is much smaller but more CPU-intensive to decode, which can make it feel less smooth on older machines despite the smaller file size. Choose ProRes Proxy when editing speed matters most; choose H.264 when drive space or file transfer speed is the bigger constraint.
Q: What's the difference between optimized media and proxy media?
A: Optimized media transcodes your footage to a higher-quality intermediate codec at full resolution for better playback performance, without actually shrinking the file the way a proxy does. Proxy media is the smaller, lower-resolution stand-in built specifically for editing speed. DaVinci Resolve and Final Cut Pro both offer this as two separate systems; Premiere Pro's proxy workflow doesn't split into two named options the same way.

Kay Sesoko
Marketer
Share post