How to Add Captions In Premiere Pro Using An Auto Caption Plugin: Step-By-Step Guide
Discover how to add captions in Premiere Pro using an AI video editor and an auto caption plugin. This step-by-step guide covers installation, transcription, and SEO optimization to enhance accessibility and engagement.

TLDR: To add captions in Premiere Pro, use the Text panel to auto-generate captions from your sequence audio, then style and export them as burned-in or sidecar files. Premiere Assistant automates the generation and styling steps using trendy karaoke-style caption presets.
We live in a digital generation where content is universal and almost every video, regardless of whether it’s long-form or short-form, has some form of subtitling or captioning to make it more accessible to any audience. Whether your goal is to improve accessibility to your videos, create more visually captivating videos, or even increase audience engagement, captioning has become a must-do step in the video editing process. As such, video editing tools such as Premiere Pro all have features and interfaces to accommodate this.
However, captioning is a notoriously time-consuming part of the editing process. In 2025, thankfully, you can use auto caption plugins to assist you. Today, we’ll take a look at how to use an auto caption plugin in Premiere Pro.
Note: This article will use the Premiere Assistant plugin as a case study for this step-by-step tutorial. If you would like more recommendations on auto caption plugins, read our feature on the best auto caption plugins for Adobe Premiere Pro.
Why Use An Auto Caption Plugin in Premiere Pro?
Captions have become a non-negotiable part of video content, whether you’re creating YouTube videos, social media clips, or professional productions. However, manually adding captions in Premiere Pro? That can be a tedious, time-consuming process - especially if you’re working with long-form content.
That’s where auto caption plugins come in. Instead of spending hours manually transcribing and syncing captions, a plugin automates the process, generating accurate captions in just a few clicks. Not only does this save you time, but it also ensures your captions are more precise, customizable, and ready to enhance engagement across different platforms.
If you want to streamline your workflow and make your videos more accessible without the hassle, using an auto caption plugin is the way to go. Let’s dive into how you can use one in Premiere Pro!
Step-By-Step Guide: Adding Captions With An Auto Caption Plugin
1. Install and Set Up the Plugin
First things first, you need to decide on the auto caption plugin that you’ll be using in Premiere Pro.
For example, if you’re planning to use the Premiere Assistant plugin, then install it from the official Cutback website and follow the setup instructions.
2. Import Your Video Into Premiere Pro with Clear Audio Quality
Next, you’re going to import your video into Premiere Pro and get ready to start editing. Make sure that the audio of your video is of high quality and any spoken monologue/dialogue is clear, as this will affect the quality of your transcription and eventually your captions.
3. Transcribe Your Video Footage
Traditionally, you could always skip this step and insert your captions manually. However, in 2025, auto caption plugins have introduced more and more editors to the power of transcription, and using them to edit and caption your video.
Transcribing your audio first is a great way to save time editing in Premiere Pro and use efficient text-based editing to get the editing job done faster. Instead of scrubbing timelines, feel free to cut and trim words, sentences, etc., based on the timestamps made available in the transcript.
If you’re looking for more possible transcription tools to use, check out our feature on the best video transcription tools.
In the case of using plugins like Premiere Assistant, you would also be able to remove silences from your transcript with the click of a button.
4. Create Captions Using Your Transcription
Now, you will easily be able to turn your transcription into captions; most plugins or video editing interfaces will have an option to convert your transcript into captions.
In the case of video editors like Premiere Pro, these will usually be subtitle-styled captions without any styling or formatting. However, many auto caption plugins and AI video editors like Premiere Assistant will allow you to create animated and styled captions immediately - even in the trending karaoke style that many creators use in their videos on TikTok these days.
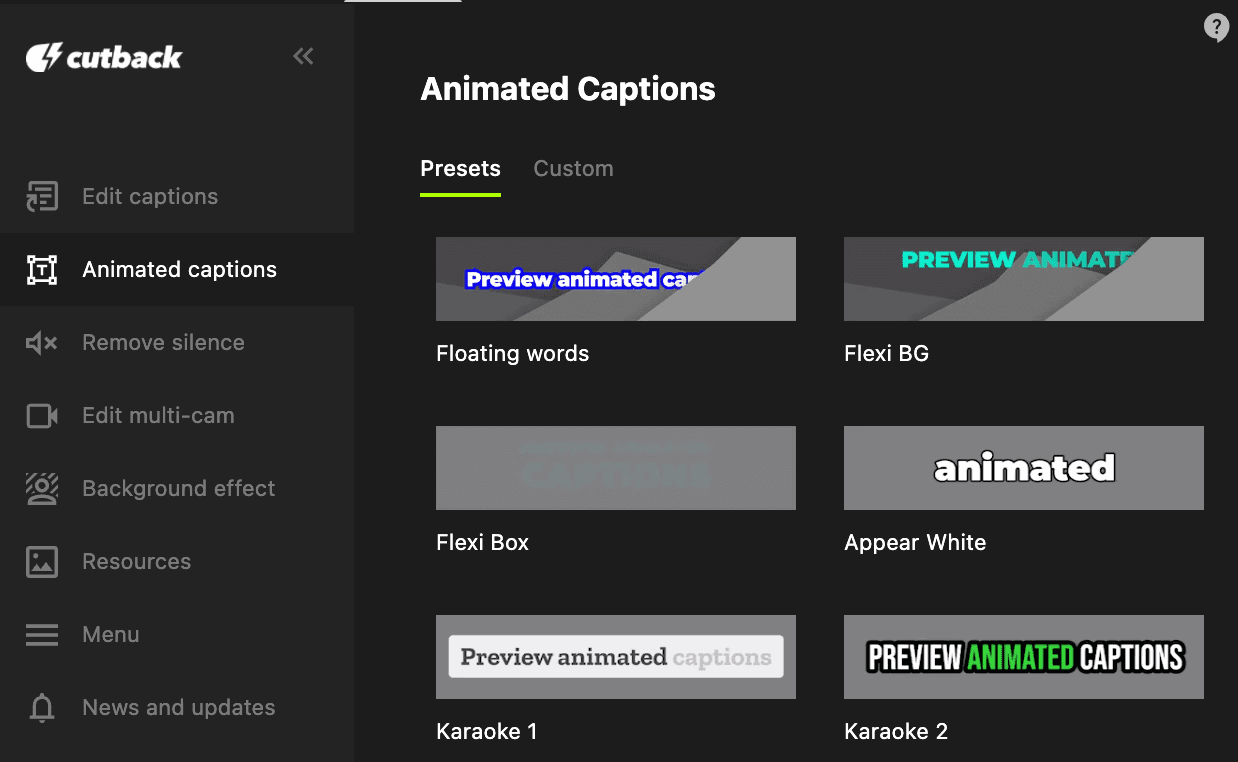
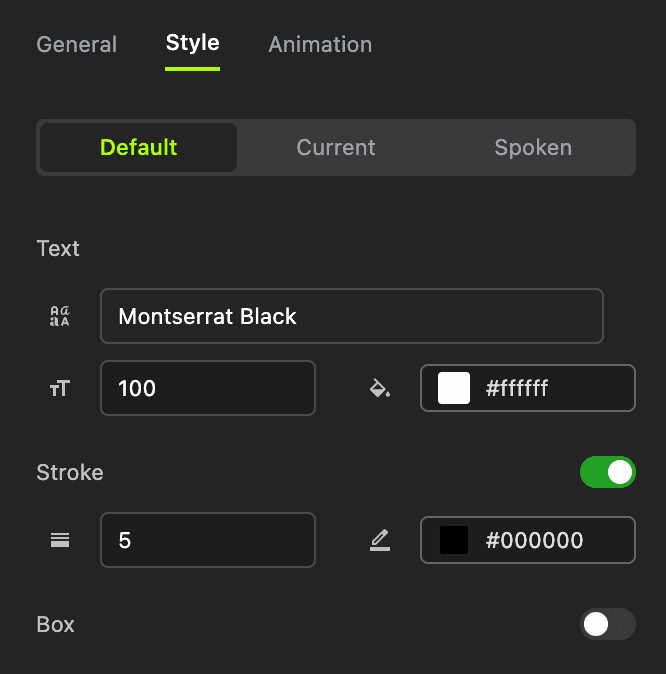
You will also be able to make adjustments to them after the fact, such as changing positioning, font, and even the color of the captions, regardless of the style you chose.
Tips For Optimizing Your Captions
Adding captions to your video in Premiere Pro using auto caption plugins will not only elevate the quality of your videos but simultaneously make them more accessible… But the automation of the captioning process will save you hours of editing time, too. Here are some key tips to optimize your captions for better accessibility and viewer experience:
1. Keep Your Captions Concise
Long-winded captions can overwhelm viewers. Stick to short, readable lines that match the natural flow of speech. A good rule of thumb? No more than two lines per caption.
2. Optimize Captions For SEO
If your video is for YouTube, surprise, surprise, accurate captions with relevant keywords can boost your search rankings! Search engines index captions, making your content easier to discover by a wider audience.
3. Use A Short-Form Frame Guide
Using a short-form video frame guide will help you realize the danger zones where your text will be lost behind whichever social media platform's UI (user interface - e.g., the like, follow, and share buttons).
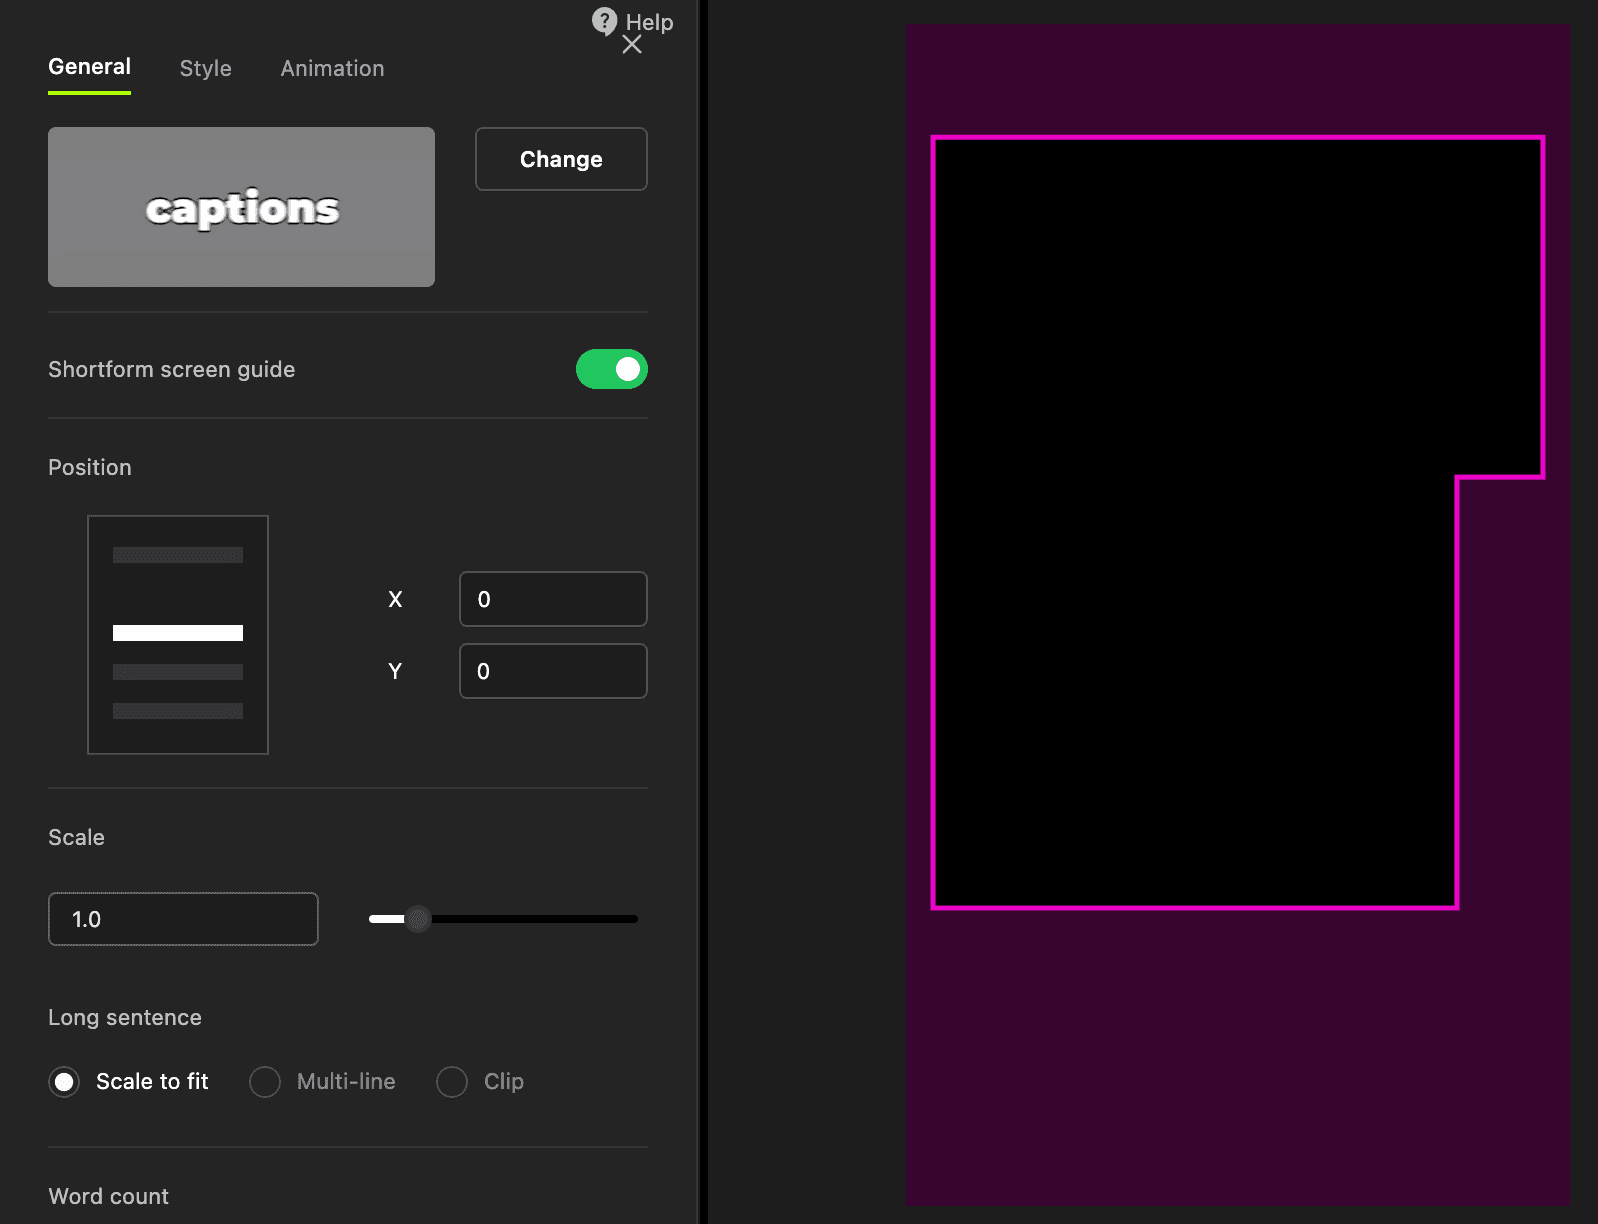
Keep all of your text within this frame’s borders to make sure that nothing obscures your text.
If you’re using Premiere Assistant as your auto caption plugin, you’ll be happy to know that it has a built-in guide that pops up on your editing screen and can easily be removed once you’re done editing with a toggle button.
Check out our tutorial video on how to use the Animated Caption feature in Premiere Assistant, too.
Try the Premiere Assistant plugin for free TODAY at the link.
What are your favorite auto-captioning hacks? Share your thoughts with us on Cutback’s official social channels!
Frequently Asked Questions (FAQs)
Q: Can Premiere Pro automatically add captions?
A: Yes. Premiere Pro can auto-generate captions using its built-in Text panel, go to Window > Text, click the Transcribe Sequence button, and Premiere Pro will transcribe your audio and create a caption track automatically. The native transcription supports 19 languages and produces subtitle-style captions without word-level animation. For animated, styled captions (karaoke-style, word-highlight, TikTok-style) you need a plugin like Premiere Assistant, which also supports 100+ languages and word-level time sync.
Q: How do I add captions in Premiere Pro step by step?
A: There are two methods. Using Premiere Pro's native tool: go to Window > Text > Transcribe Sequence, wait for transcription to complete, then click Create Captions. Premiere Pro generates subtitle-style captions in the Caption track. Using Premiere Assistant: install the plugin, open it in your Premiere Pro workspace, run the transcription, choose a caption style from the preset library, and the plugin places animated graphic clip captions directly on your timeline. The Premiere Assistant method produces styled, animated captions ready to publish without additional formatting steps.
Q: How do I edit captions in Premiere Pro after generating them?
A: For native captions, click on any caption segment in the timeline to select it, then edit the text directly in the Text panel. You can adjust timing by dragging the caption segment edges in the timeline. For Premiere Assistant captions, open the transcript editor in the plugin panel, edit the text there, and changes update across the timeline automatically. Font, colour, size, and positioning can be adjusted via Effect Controls for any selected caption segment.
Q: How do I change the font of captions in Premiere Pro?
A: Select the caption segment in the timeline, open the Essential Graphics panel (Window > Essential Graphics), and adjust the font, size, colour, and alignment from the Text properties. For native Premiere Pro caption tracks, font changes apply to the selected segment, to apply consistently across all captions, right-click a styled segment and use Paste Attributes to apply the same formatting to all caption segments. Premiere Assistant's preset styles apply consistent formatting across all captions automatically at generation, without requiring per-segment adjustments.
Q: What languages does Premiere Pro support for auto captions?
A: Premiere Pro's built-in auto captioning supports 19 languages including English, Spanish, French, German, Japanese, and Korean. For broader language support, Premiere Assistant supports 100+ languages for auto captioning using its own speech-to-text engine, which also outperforms Premiere Pro's native transcription on non-English content.
Q: How do I export captions from Premiere Pro?
A: In the Export Media dialog, go to the Captions tab and choose your export format, SRT for most online platforms, MCC for broadcast, or VTT for web. You can export captions as a sidecar file (separate from the video) or burned into the video as open captions. For social media, burning captions in is standard so they display regardless of platform settings. For YouTube, exporting an SRT sidecar file is preferred as YouTube indexes the caption text for search.
Q: How do I create captions from a transcript in Premiere Pro?
A: Transcribe your sequence first using Window > Text > Transcribe Sequence. Once complete, click Create Captions to convert the transcript into a caption track on the timeline. Premiere Pro automatically splits the transcript into timed caption segments based on pauses and speech rhythm. You can then edit individual segments by clicking them in the Text panel. If you used Premiere Assistant for transcription, clicking Generate Captions in the plugin panel converts the transcript directly into styled animated captions without going through Premiere Pro's native caption track.

Kay Sesoko
Marketer
Share post


