A Visual Guide to Professional Video Podcast Setups
A practical blueprint for video podcast setups from 1 to 4 people, covering camera angles, lighting, and layouts designed for easier editing and automation.
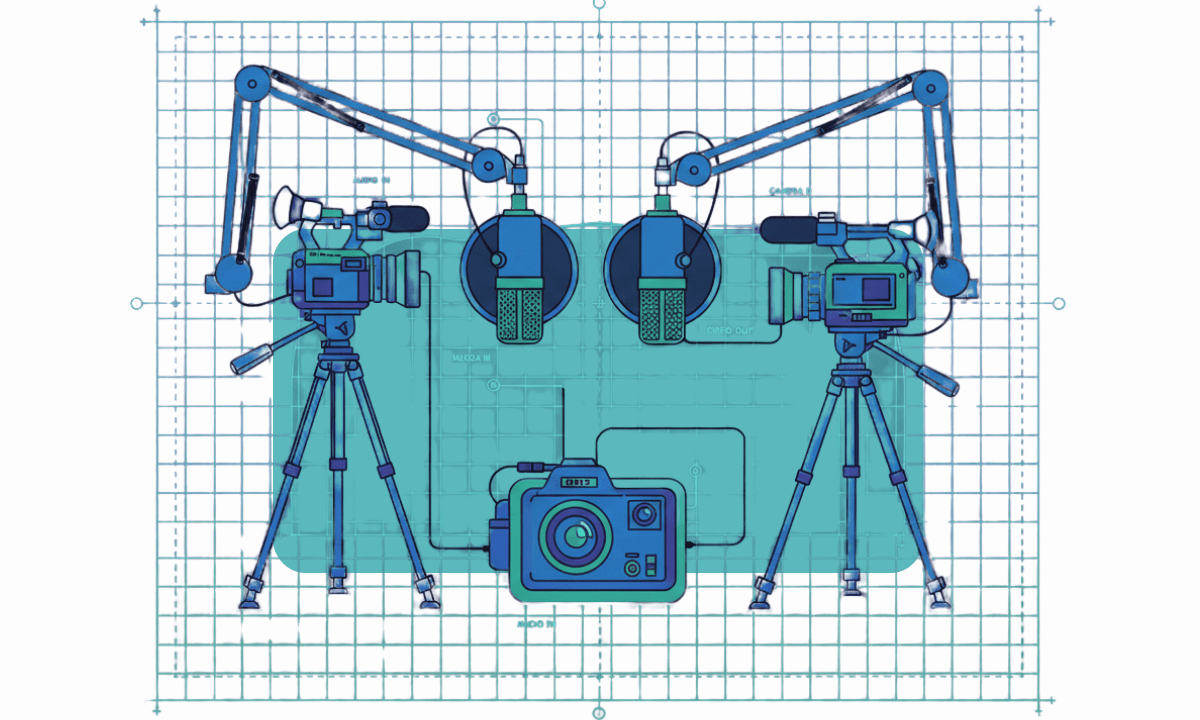
TLDR: A professional video podcast setup for one to four people uses a dedicated camera per speaker, external audio routed to a mixer or interface, a three-point lighting configuration per seat, and a multi-cam recording workflow that feeds directly into an AI pre-editing tool for sync and rough cut.
A lot of video podcasts start out simple. One person, one camera, one mic. This feels manageable, and everything works. Once you start gathering a following, you naturally want to bring in a guest to begin having more dynamic conversations. It’s exciting to talk about their experiences or expertise in a certain area.
Now audio needs more attention, and camera angles are more confusing. If you make the wrong decisions, editing takes longer. By the time there are two or three people on screen, your workflow starts to strain. Cuts might feel awkward, or clips are harder to pull. Automation tools stop helping and start getting in the way.
This guide is a blueprint for avoiding the compounding complexity of more cameras, more lights, and more audio. If you focus on repeatability, editability, and automation readiness, you too can build a podcast video setup that scales cleanly from one person to four.
The core principles of a scalable video podcast setup
Before talking about cameras and lights, it’s worth resetting expectations. Scalable video podcast setups are designed backward from the edit. They prioritize consistency over creativity because the goal is not to impress at first glance.
This all comes down to a few basics:
Consistent framing beats cinematic shots. Editors and auto-switchers rely on predictable headroom, eyeline, and framing.
Symmetry simplifies decision-making. Matching angles removes guesswork during speaker changes.
Clean audio matters more than camera quality. Clean, isolated tracks determine how usable the footage is.
Setup choices affect playback and clipping. Inconsistent angles and framing, slow switching, and clip extraction.
Before any creative editing begins, the footage from your setup goes through an assembly cut; here's how the assembly cut, rough cut, and paper cut stages differ and why understanding them speeds up your post-production workflow and editability as a whole.
This guide intentionally prioritizes editability over aesthetics. If something looks slightly flatter but saves you an hour per episode, that’s a win.
For a complete guide on how to edit a podcast or interview from start to finish, check out our feature. If you do podcast editing in Premiere Pro specifically, we have a detailed guide on that, too.
Solo podcast video setup (1 person)
Solo podcasting setups are where habits form, for better or worse. The choices you settle into here tend to carry forward when guests appear.
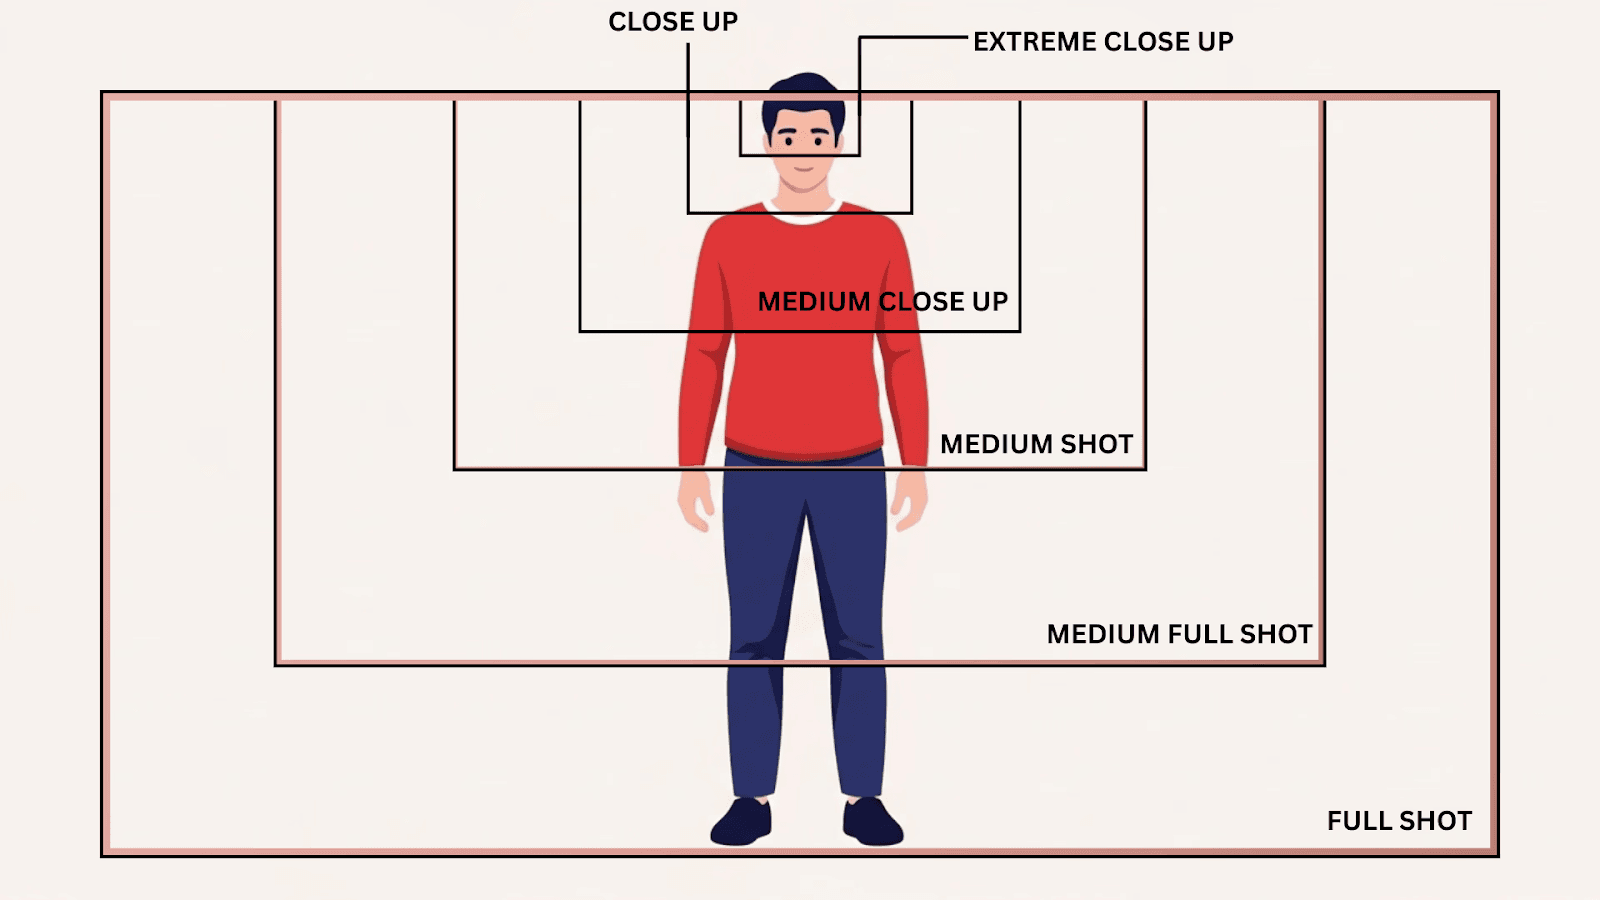
Recommended podcast camera framing
The most reliable approach is a single medium shot. Frame from mid-chest to just above the head, keep the camera at eye level, and avoid dramatic angles. This framing holds up well for long-form viewing and produces usable clips without reframing. It’s essential for creating a high-quality podcast repurposing template.
A second camera can make sense if you’re deliberately repurposing video content, but it should be treated as a utility angle. A slightly tighter crop or a mild offset works.
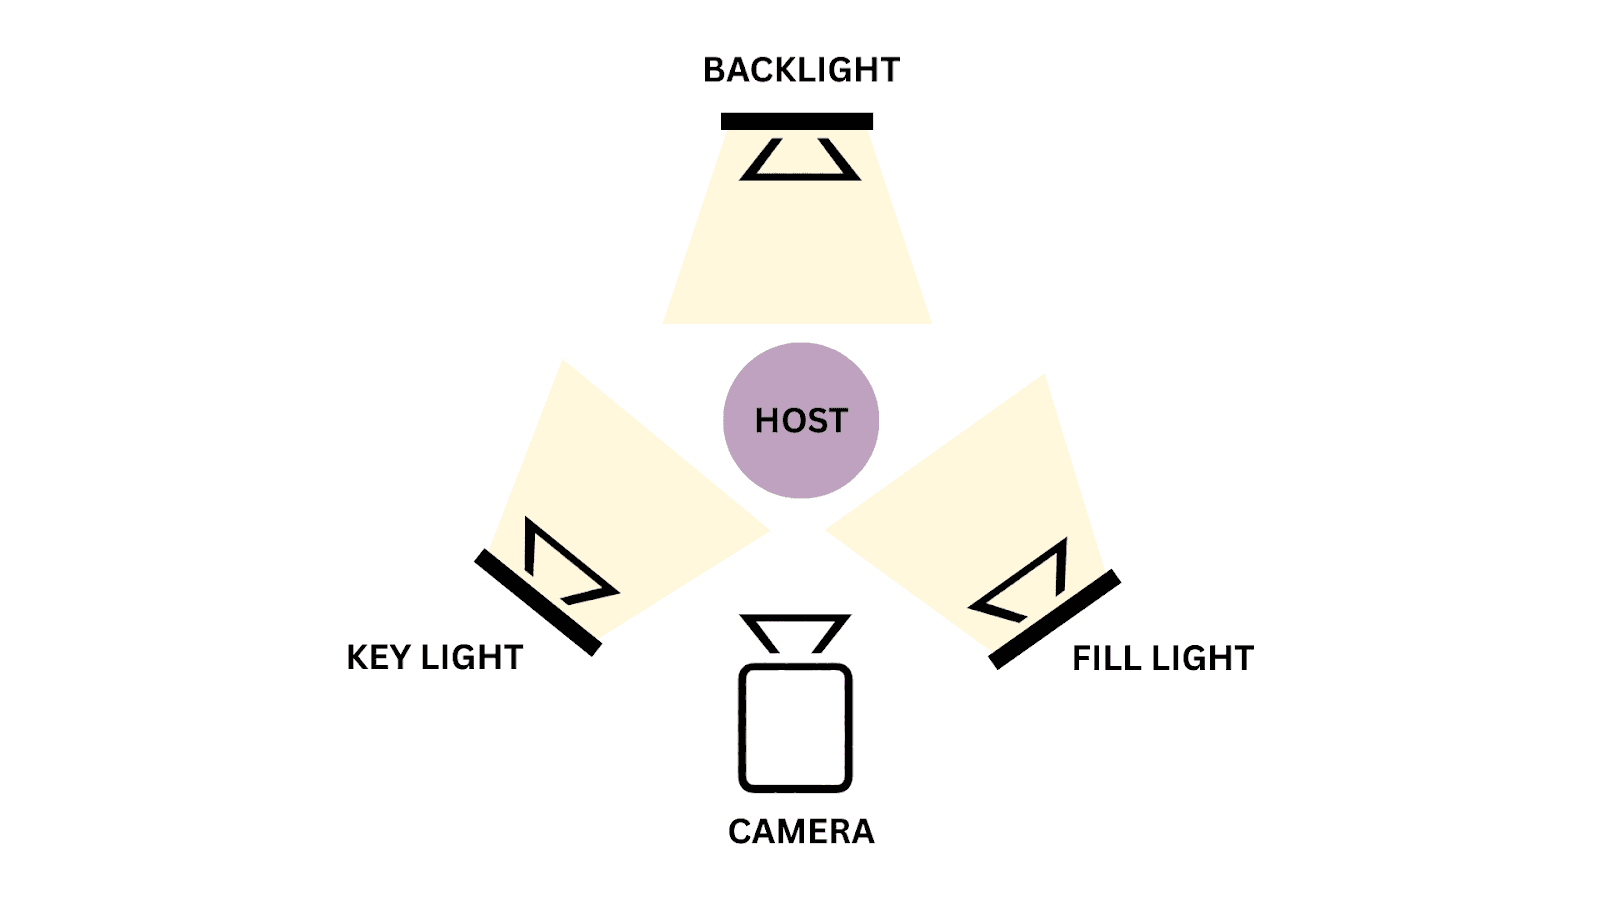
Podcast lighting fundamentals
Stick to a simple but professional lighting triangle:
Key lighting at a 30–45° angle (this can be done with ring lights or LED panels)
Soft fill lighting to control contrast
A subtle backlight for background lighting
Avoid dramatic shadows. Flat light is easier to match across episodes.
How does this shorten podcast video editing?
One clean angle means fewer decisions. Fewer cuts. And less temptation to “fix” things in post. That predictability also matters if you plan to use any kind of podcast automation. Automation tools rely on predictable visual input, and solo podcasts are where that predictability should be established.
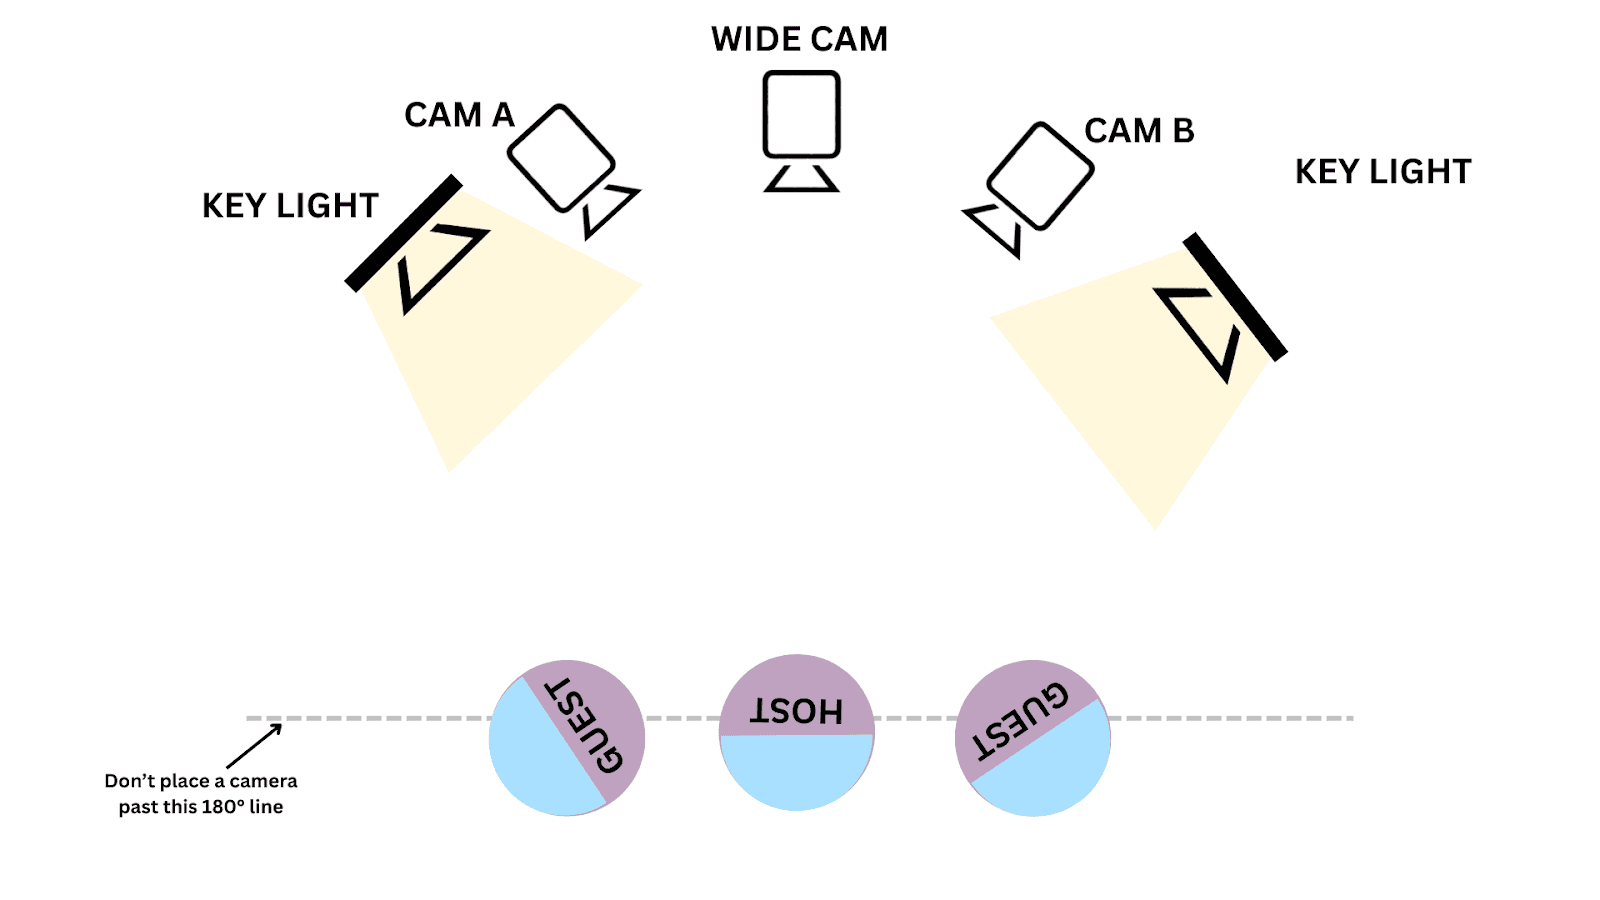
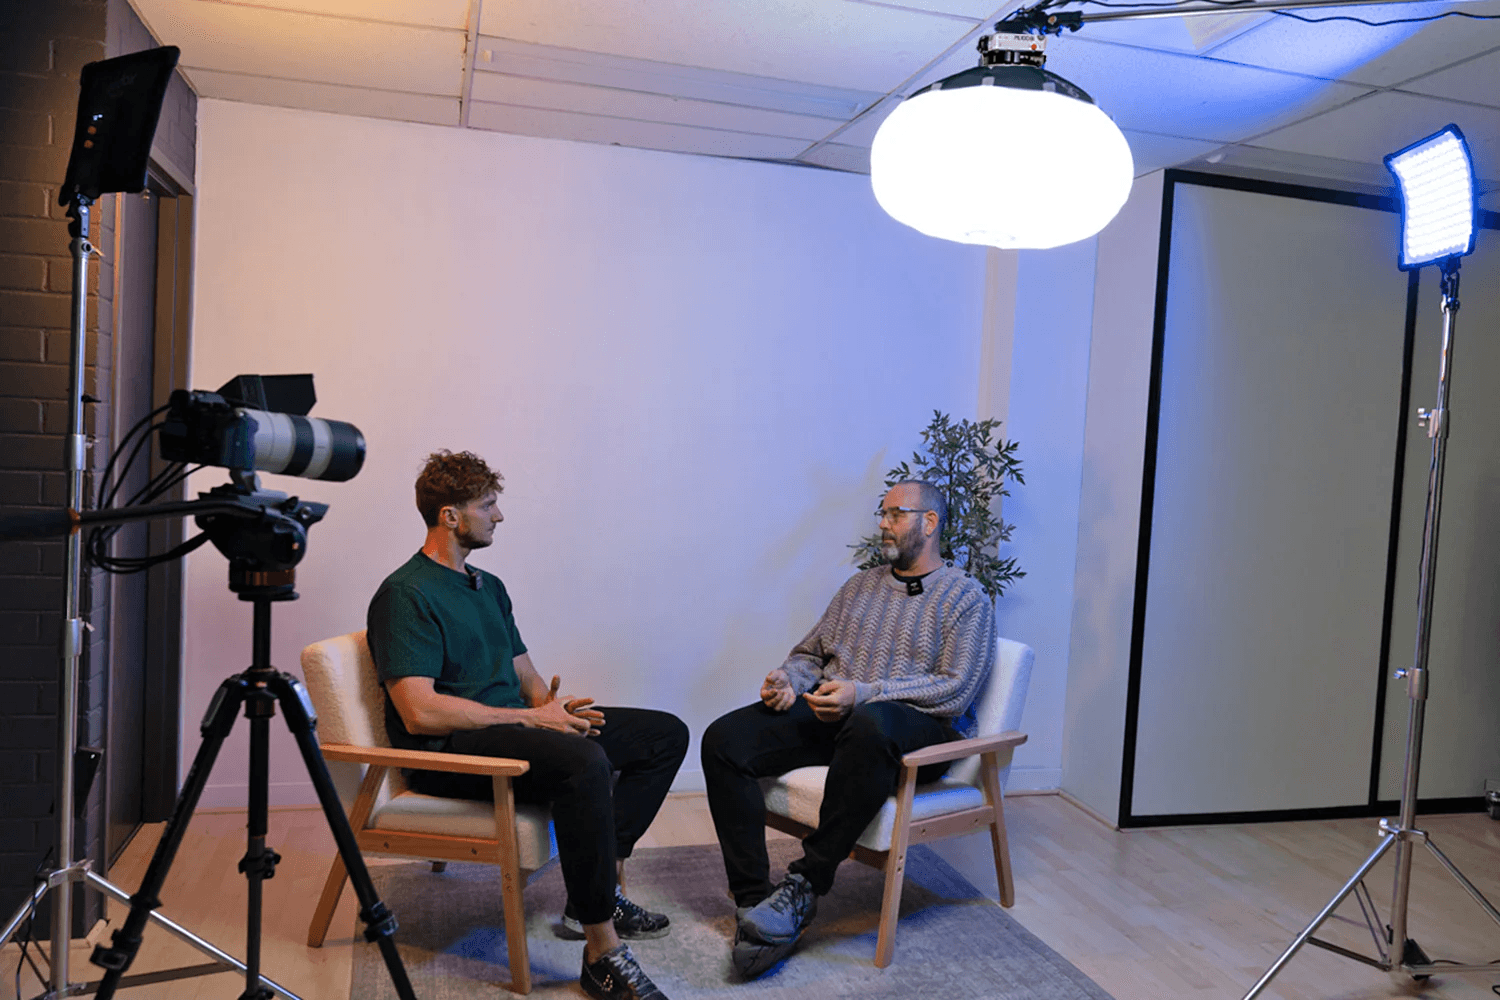
Two-person video podcast equipment setup (in-person)
Now we enter the world of the multi-camera video podcast. A podcast setup for two introduces the first real test of visual logic and how well you use your recording space. The conversation now has movement, back-and-forth. Where does the viewer’s attention go? There are two ways you can approach this.
Option A: Two cameras, two single shots
Each speaker gets their own camera, framed as similarly as possible. Eyelines sit just off-camera toward the other person, creating a natural conversational feel without breaking continuity.
This is the most edit-friendly option. When someone speaks, the cut is obvious. Speaker changes are clear, and clips isolate cleanly.
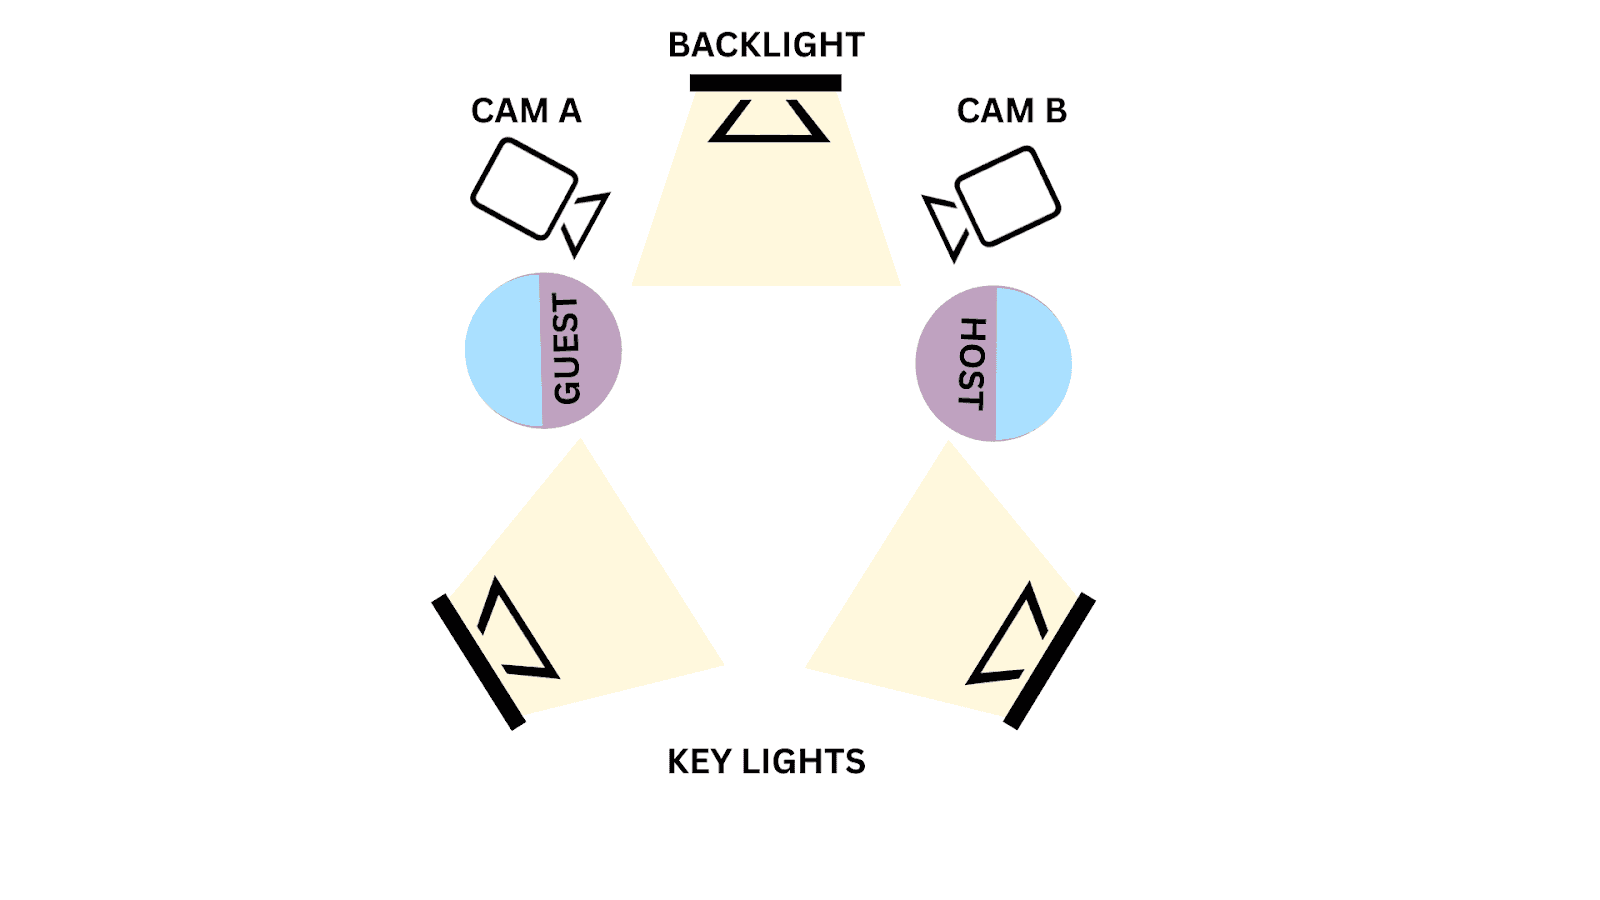
This diagram can also be used for a 2-camera interview setup, as well.
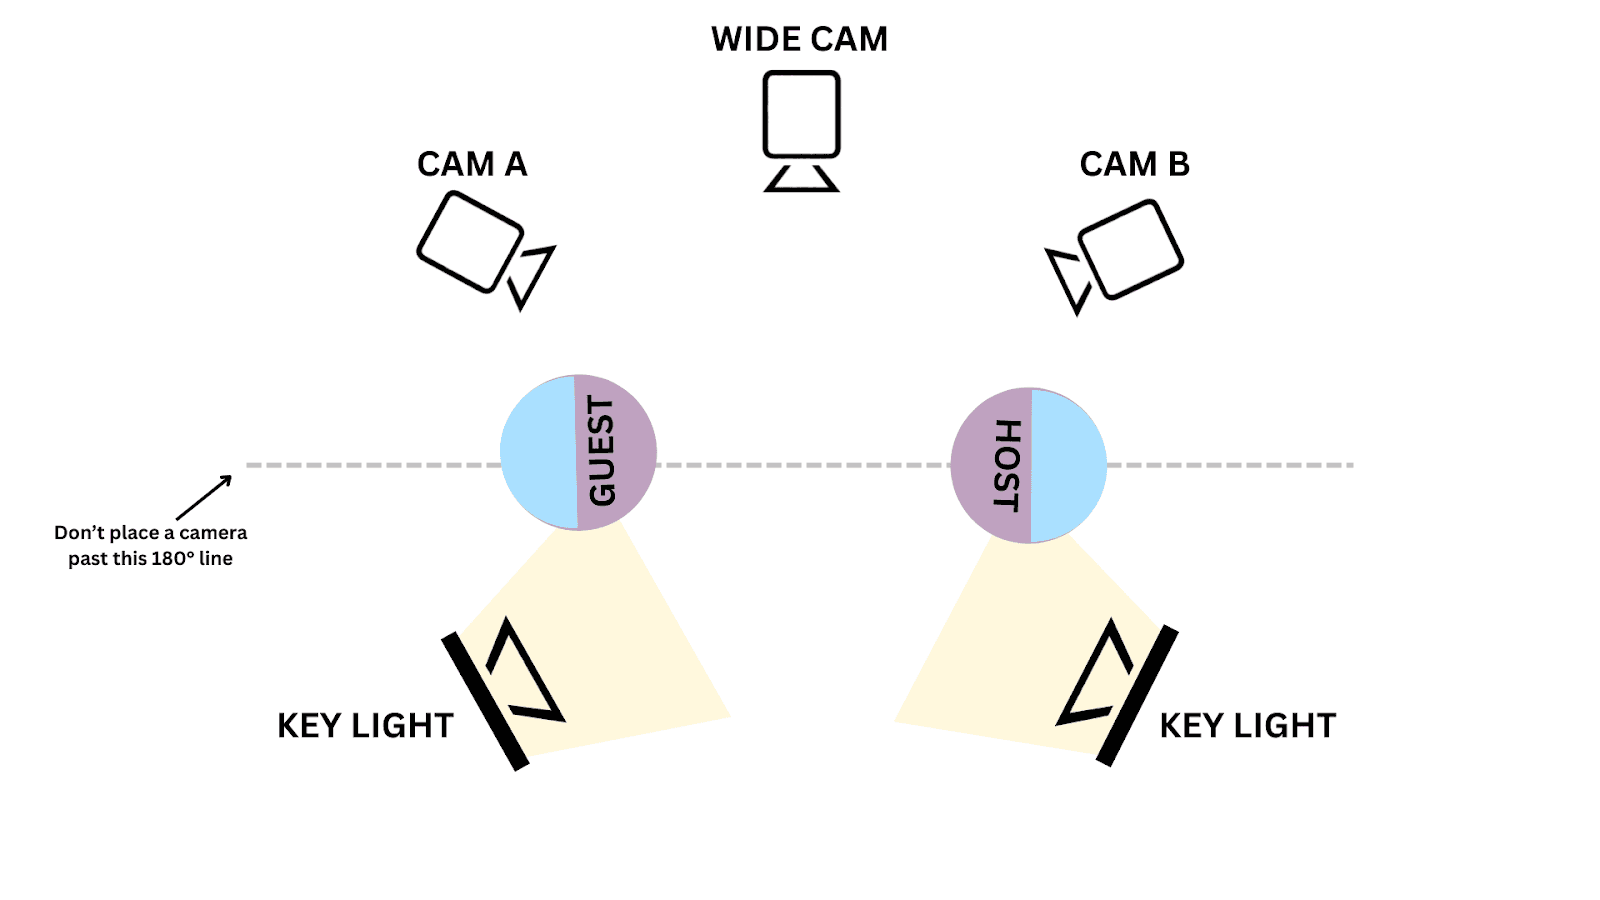
Option B: Wide plus two singles
The second option adds a wide shot alongside two singles. The wide shot establishes context, but it should not replace the singles during dialogue. It exists for transitions, resets, and visual breathing room.
Key considerations:
Eyeline alignment matters. Cameras should sit just off the conversational axis.
Respect the 180° rule. Crossing it flips screen direction and breaks spatial continuity.
Camera angles define the logic of the cut. Avoid ambiguity.
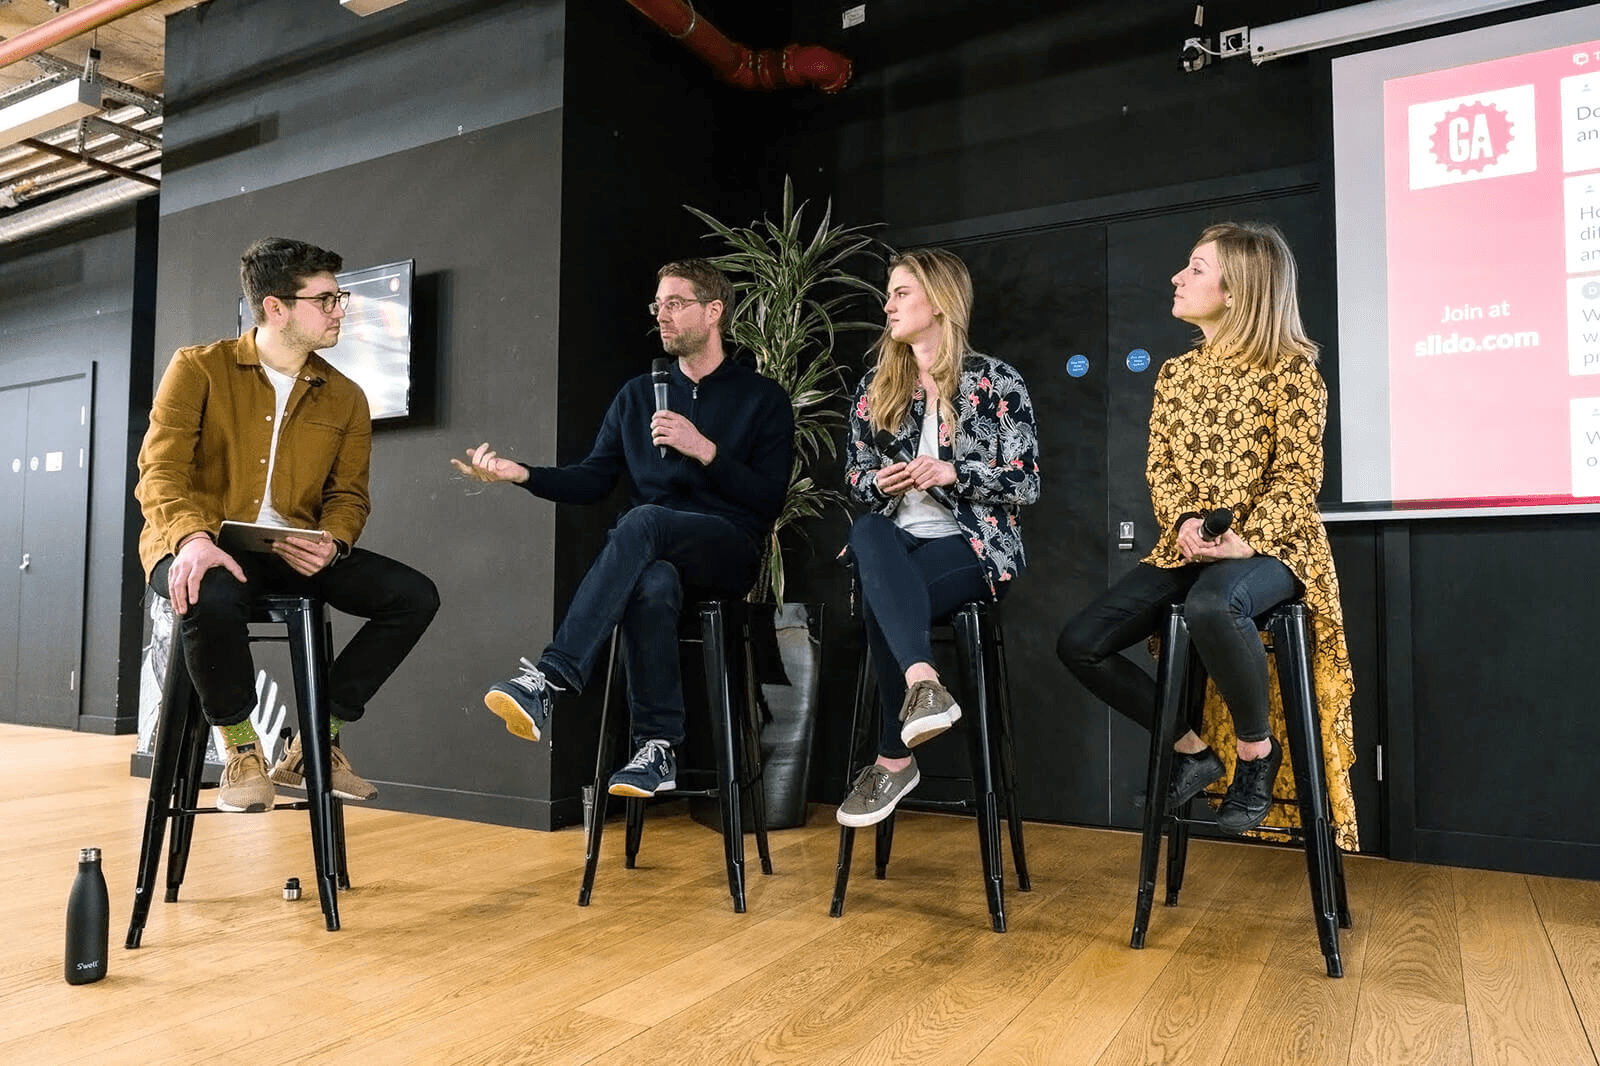
Three-person podcast video setup (the breaking point)
Moving to a 3-person podcast setup is often where otherwise solid setups start to fall apart.
Wide-only shots feel efficient during recording, but they kill engagement and limit clipping. Editors are forced to punch in digitally to capture responses, which reduces quality and consistency.
Three people create the first signs of complexity:
Speaker changes happen faster
Visual focus becomes ambiguous
Lighting differences become visible on cuts (if not using podcast lighting techniques properly)
This is where ISO recordings become critical. ISO recordings mean that each speaker (and often each camera) is recorded to its own separate, isolated track.
For example (in the context of podcast audio editing):
Host mic → track 1
Guest mic → track 2
Co-host mic → track 3
Separate camera feeds and isolated audio tracks give editors room to maneuver when conversations overlap or pacing changes.
Lighting also becomes more demanding. Small differences in exposure or color temperature are noticeable jumps during cuts. When cuts jump between speakers, mismatched lighting pulls attention away from the conversation.
One more practical example of a 3-person podcast setup is the “Time for More” podcast.
Four-person podcast video setup (roundtable vs panel)
At this point, you’re no longer dealing with a conversation that naturally guides the edit. You’re managing attention across multiple speakers, overlapping reactions, and shifting dynamics in a podcast setup for 4. This pushes the limits of manual editing and video editing automation.
Giving everyone equal visual weight creates noise. Editors lose a clear sense of priority, and cuts feel busy instead of intentional. Even automated tools struggle because there’s no consistent hierarchy to follow.
There are two ways to go about this, depending on your needs and preferences:
Panel-style layout
Speakers are arranged in a line or shallow arc, and camera coverage is designed around role and priority rather than symmetry. This makes editing more predictable. The editor always knows where to go when someone speaks, and automated camera switching has clearer signals to work with.
The tradeoff is rigidity. Panel layouts can feel less conversational, and reactions from non-speaking guests are often de-emphasized or missed entirely.
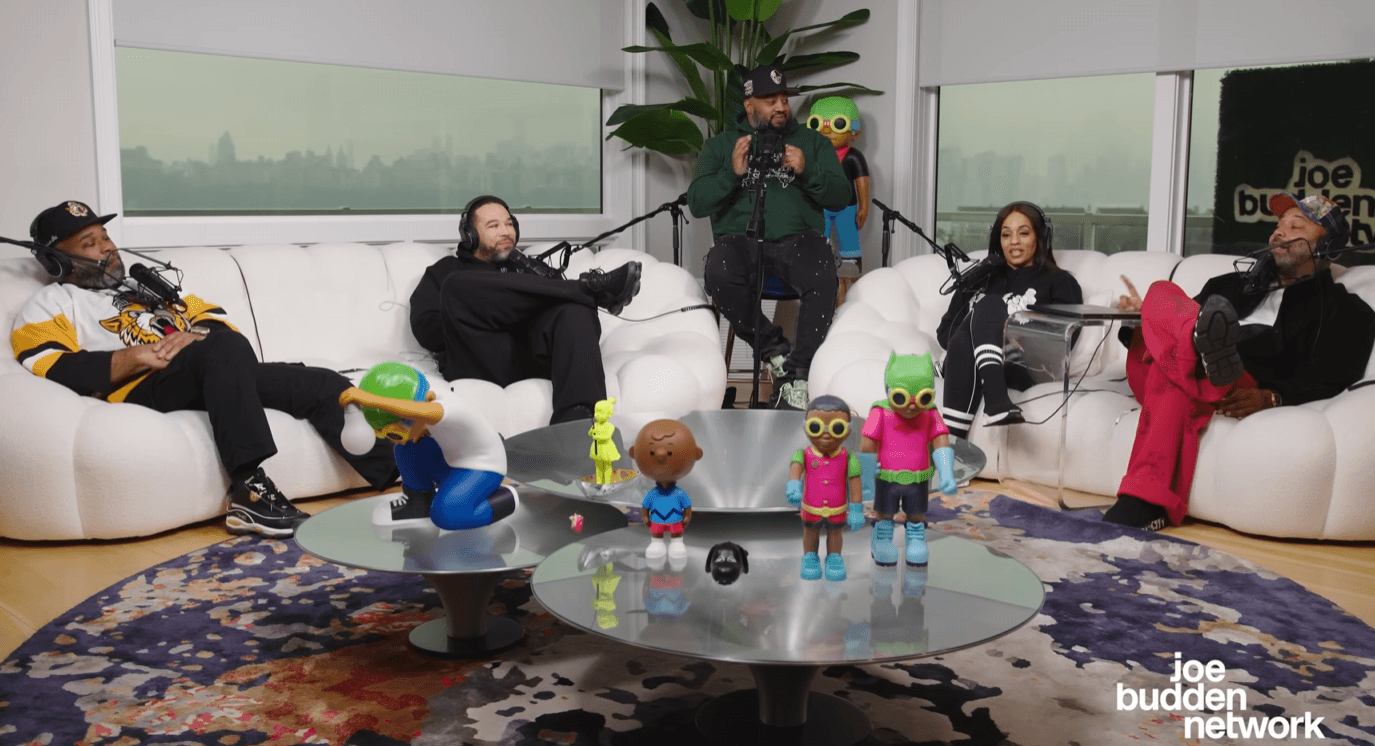
The Joe Budden Podcast Episode 796
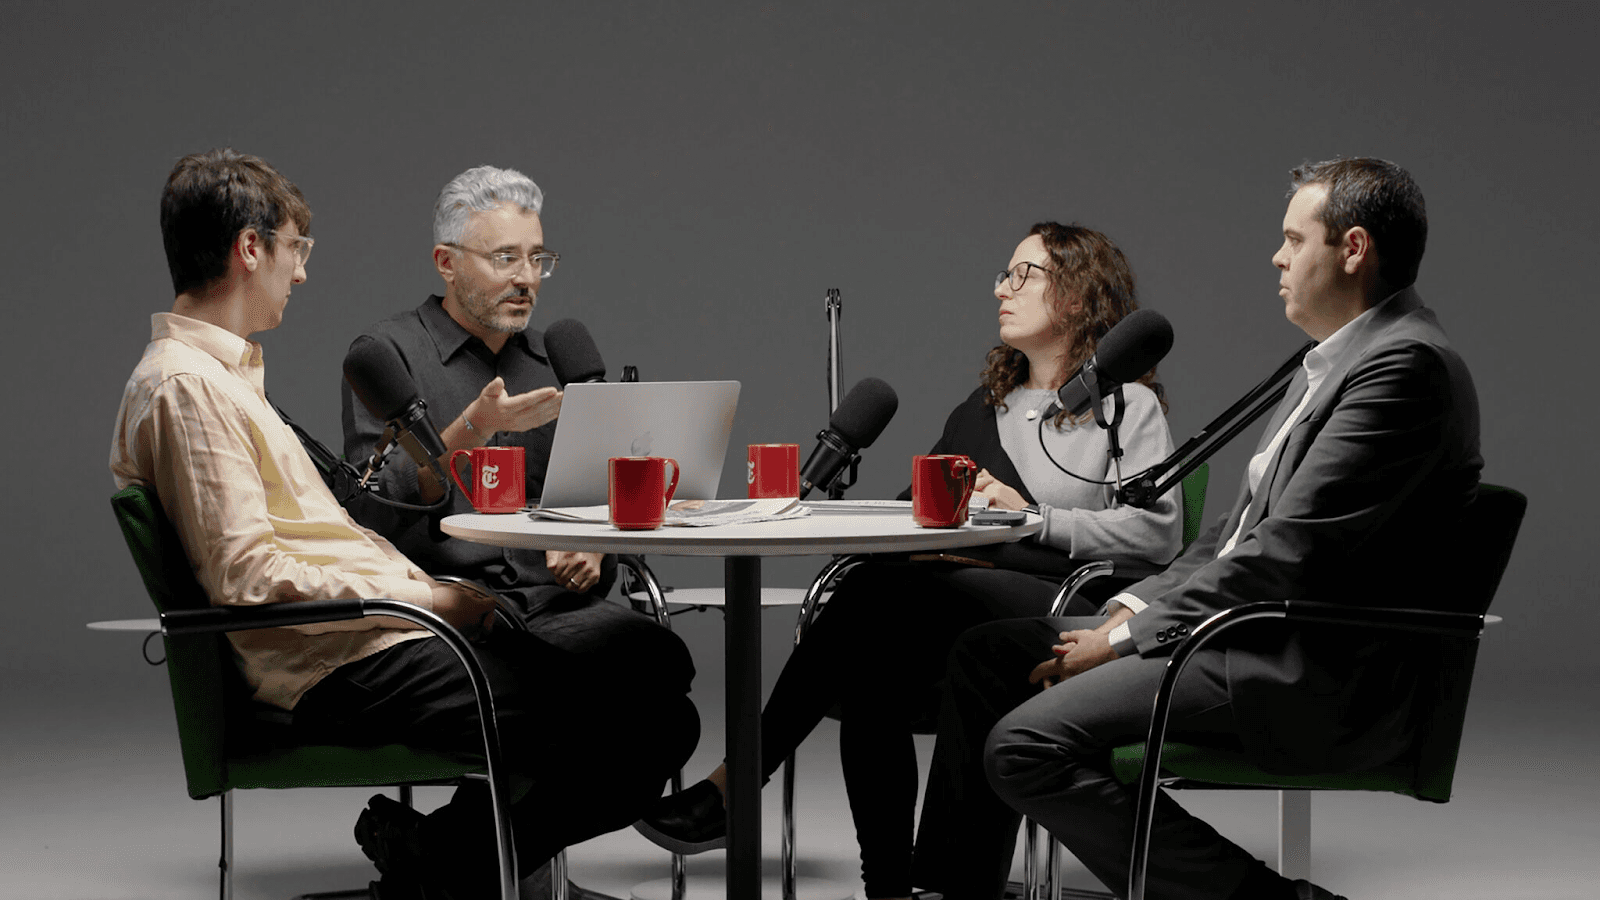
Roundtable layout
Roundtable setups lean in the opposite direction. They preserve the natural flow of conversation and make cross-talk and reactions feel more organic.
The cost is visual control, which affects video quality. Eyelines, camera angles, and lighting become harder to keep consistent across the group. From an editing perspective, this increases decision-making on every cut.
General rules for a four-person podcast setup
Neither approach is inherently better, although the panel is certainly more amenable to automation. The key is committing to one and designing the setup around its limitations. Mixing panel logic with roundtable behavior usually creates the worst of both worlds, where the edit feels constrained but still chaotic.
But if you can keep these rules in mind:
Not every speaker needs equal camera priority. Someone is always driving the conversation, even in a free-flowing discussion. Primary hosts deserve consistent, reliable singles. Secondary speakers can be covered more sparingly without hurting the viewer’s understanding.
Wide shots should support, not replace, singles. Wides are useful for resets, transitions, and establishing context, but not dialogue.
Lighting must be standardized, not customized per person. Uniform lighting may feel less tailored on set, but it produces footage that cuts cleanly and holds together visually.
Camera angles that make editing easier (not harder)
For editing and repurposing, medium close-up (MCU) shots are consistently the most useful. Framed from the chest up with stable headroom and a neutral eyeline, they keep faces readable without losing context. This works for long-form playback and holds up when clips are pulled without additional cropping or reframing.
Framing consistency matters just as much as the shot choice. When cameras follow the same framing rules across episodes, automated switching tools can make reliable decisions. Speaker changes are easier to detect, cuts align more closely with the conversation, and less manual correction is needed afterward.
Extreme angles also cause problems. Heavy side profiles, steep camera placement, or dramatic tilts break visual continuity and confuse switching logic that expects faces to occupy roughly the same space between cuts. These angles may look intentional on their own, but they complicate sequencing and reduce clip usability.
The best camera angles are boring in isolation and powerful in sequence. Medium shots, restrained angles, and consistent framing reduce decision-making during cuts, support automated switching with podcast AI tools, and make clip generation more reliable.
Lighting for editors, not cinematographers
The podcast lighting setup tends to get framed as a creative decision, but in a video podcast workflow, it is largely a technical one. The way a set is lit determines how much corrective work happens later, especially once multiple cameras and speakers are involved.
Flat, even lighting is easier to work with in post because it behaves predictably. When faces are lit evenly, exposure stays within a narrow range, and color correction becomes a global adjustment rather than a shot-by-shot fix. Editors can balance the entire sequence quickly.
Lighting directly affects:
Skin tone consistency across cameras
Visual continuity between speakers
How forgiving the footage is during clipping
If lighting looks slightly plain on set but clean in the timeline, it’s doing its job. You’re setting up a podcast, not shooting a film, and the lighting should reflect that.
Designing your setup for AI podcast editing & repurposing
Scalable podcast setups are designed with the assumption that decisions will be made later, not during recording. The goal is to capture clean, predictable inputs that give editors and systems room to operate, rather than locking the footage into a specific look or rhythm too early.
Effects, crops, and visual emphasis can always be added later, but they’re hard to undo in video podcasting software. A setup that prioritizes clean framing, even lighting, and isolated audio gives the same source material the flexibility to become a full episode, a short clip, or a social cut without fighting its own constraints.
Those same choices affect how the timeline behaves. Footage that’s framed and lit consistently is easier to play back and easier to cut. Editors spend less time correcting small differences between shots.
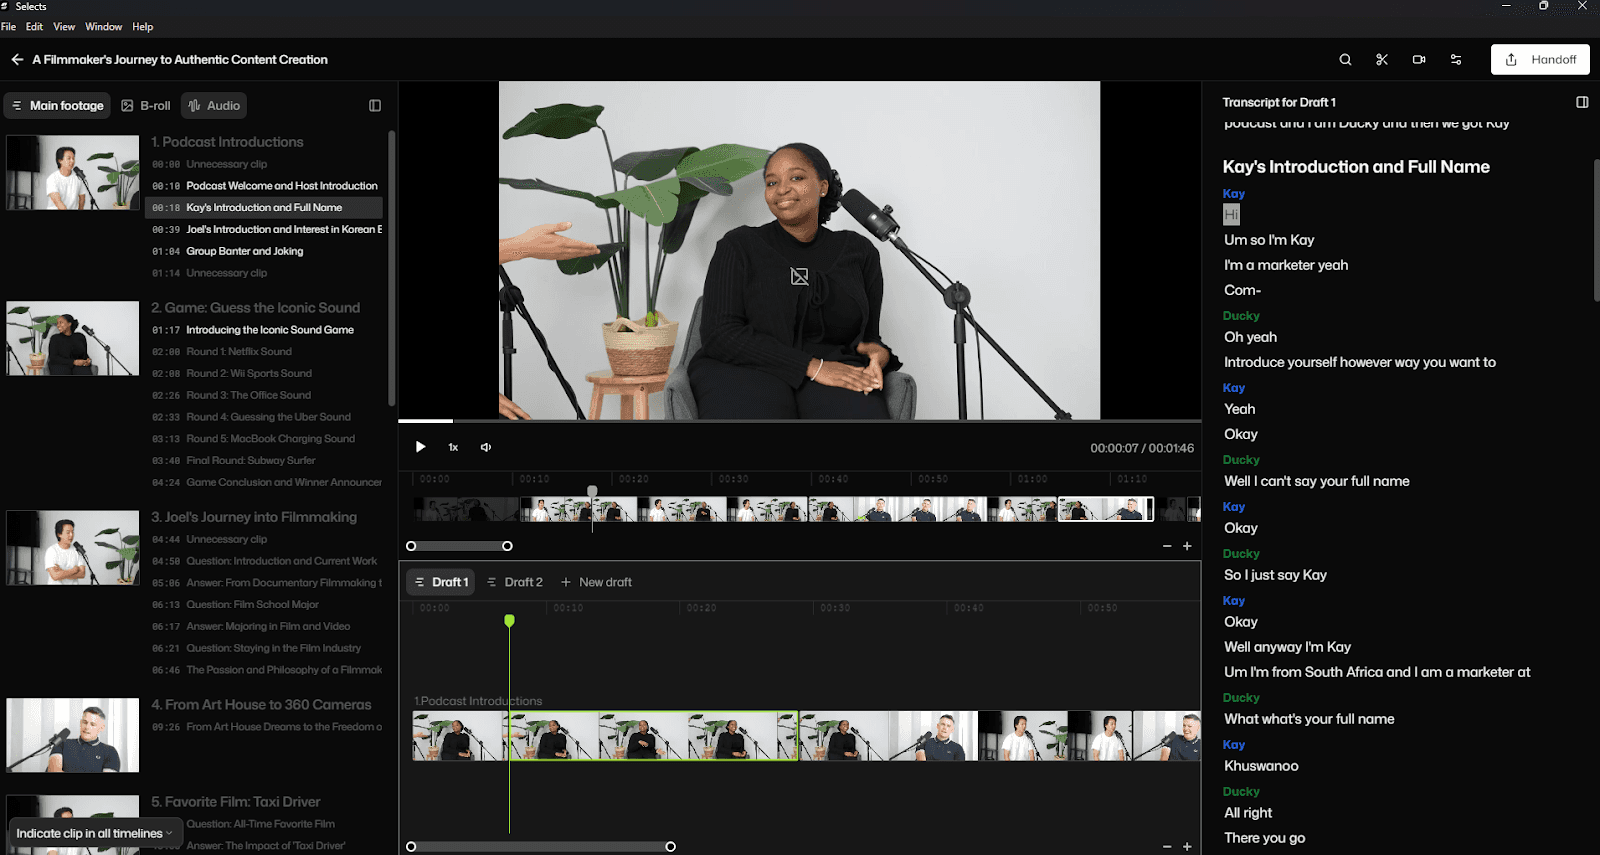
Podcast editing automation also depends on sameness. Editing software or camera switcher software like Selects that assist with camera switching or clip generation depends on repeated visual and audio patterns. When every episode follows the same structural rules, automation remains reliable instead of brittle.
This applies even if you’re recording solo today. Locking in a setup that’s consistent and easy to edit gives you a reference point for everything that comes later. When you add guests or move to a two-, three-, or four-person format, you’re extending a setup that you already understand.
If you’re still debating which is the best AI podcast editor to use, check out our comparison feature. You can also read about Autopod troubleshooting if you’re looking for more information on alternative podcast editing tools.
Your setup is an editing choice
Using good video podcasting equipment and a good video podcast setup is an editing decision. One of the most important decisions in your post-production workflow. It’s about how easy the footage is to work with once recording is over. Avoid recording decisions that make editing slower, harder, or inconsistent.
Thinking through the setup early saves time later in very real ways. There’s much less time spent correcting things like exposure, reframing shots, or working around limitations that could have been avoided. As a benefit, setups that are easier for an editor to manage also make automation usable. Tools for switching, clipping, and segmentation can actually help instead of getting in the way.
For more in-depth knowledge about the ins and outs of video editing, check out our latest posts on the Cutback blog or our YouTube channel.

Kay Sesoko
Marketer
Share post


